


If you, like me get scissor happy and tend to hack off sleeves at the drop of a... well sleeve then you're going to want to know a few different tricks to finish off this raw edge. Sure there's nothing wrong with turning it under and stitching, but maybe you want to try something different.
Cue Tutorial no. 1 Inserting piping to finish a raw sleeve edge
1. There are two sides to piping, one has neat stitching this is the right side (top picture) and one has lots of stitches, the wrong side (bottom)

2.If you always start (and finish) sewing the piping on at the under arm seam then you're going to hide a multitude of sins, plus by the time you get to a visible point (front of the garment) then you'll have already got the hang of it.


3. Stitch the piping on to the sleeve edge all the way around the sleeve, you are stitching over the stitches that already existed on the piping, to be extra neat try stitching a hair closer to the fat edge of the piping. Keep checking that your piping raw edge is aligned with your sleeve raw edge.

4. Once you get back to the beginning overlap the piping and again stitch the piping down so that it veers off the edge of the fabric, looks messy but it will make sense in a minute.

4. Cut the excess piping and save what's left for the other sleeve

5. Now fold the piping in towards the inside of the seam, the piping will be standing proud and the raw edge will be on the inside of the sleeve hidden. You can stitch in the ditch (the channel between the fabric and the piping) so that it's completely hidden or as I've done here you can make it a decorative element and top stitch it 1/8 or so away from the piping. This is your call, we're only stitching to keep the piping raw edge from popping up.
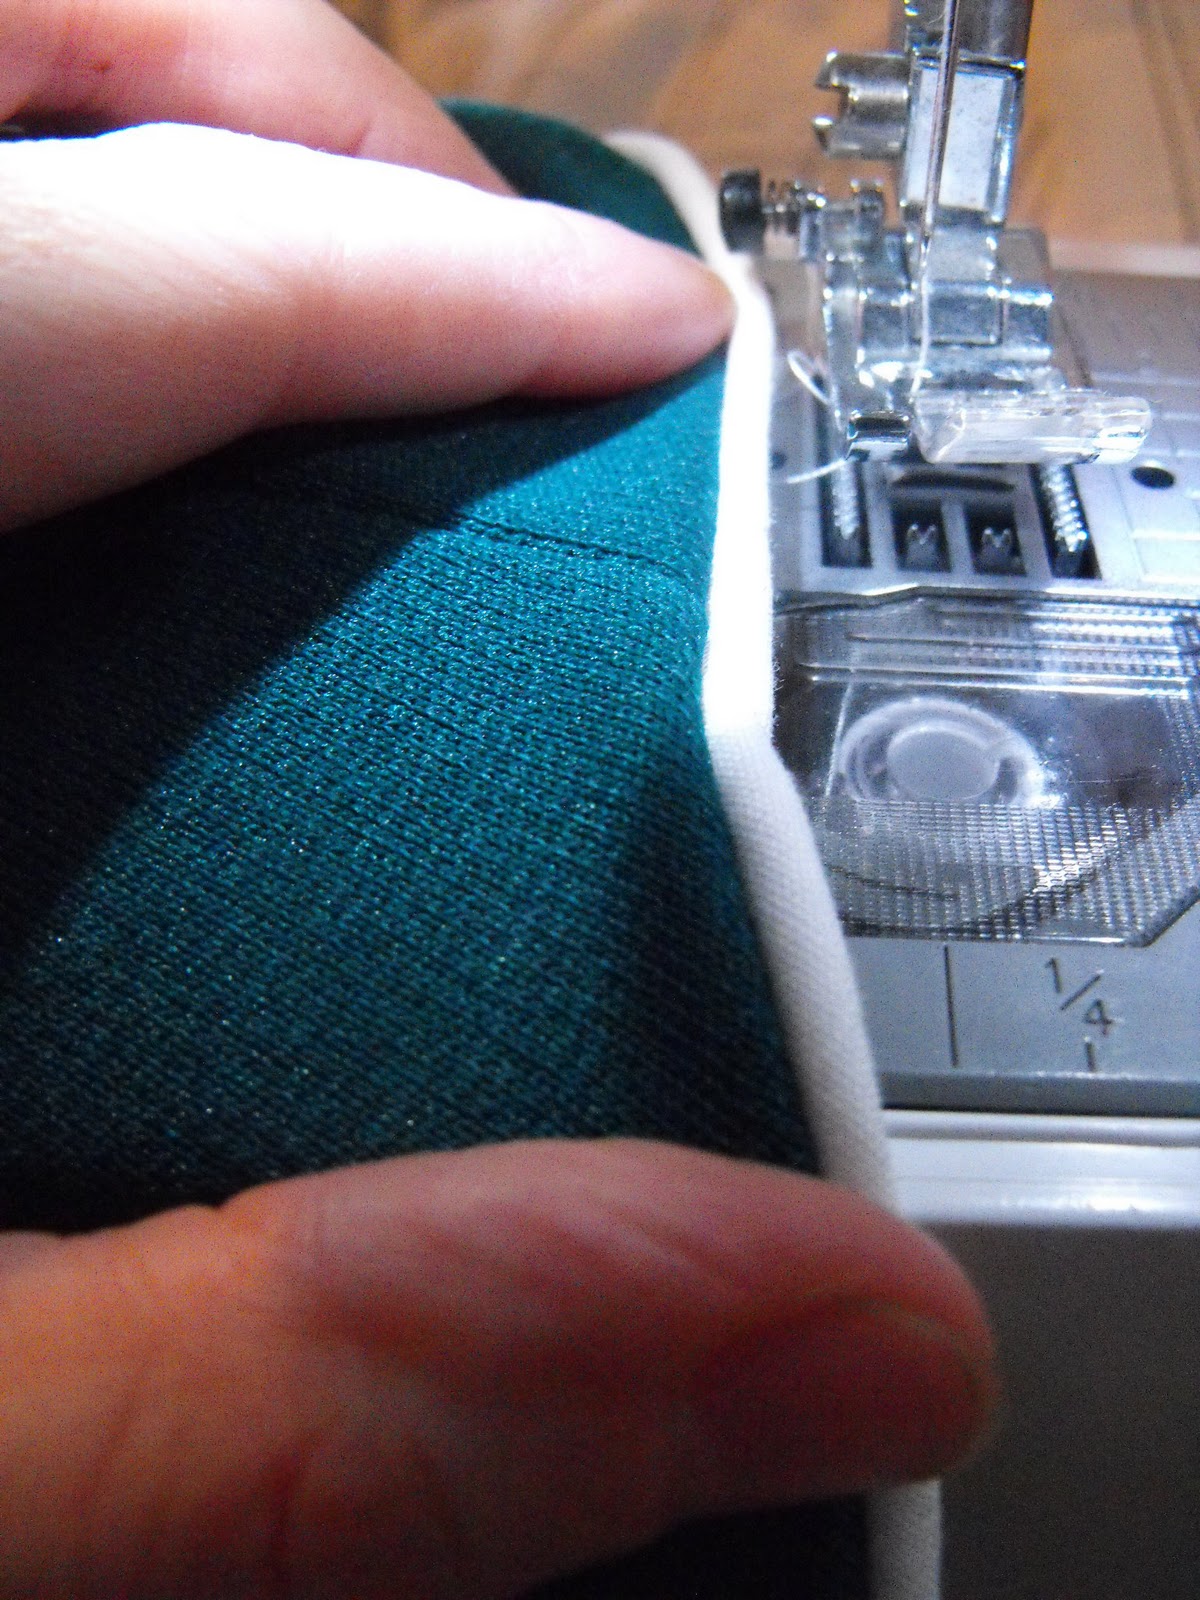

As I am sewing I like to make sure that the fabric is butting up against the piping so that the stitches of the piping itself aren't showing. Just squeeze it together a little as you sew it.

Now you're finished.
Notes:
* Always make sure you have enough matching piping to complete both sleeves before you start stitching.
* Your piping will be more noticeable on the inside of the garment if it contrasts with the dress itself. If you're concerned that the piping is showing then stitch another row of stitches approx 2/8 (1/4 inch) away from the existing stitches, the measurement is just a guide, you just need make sure that you are catching the raw edge of the piping in your row of stitches.
Sit back and admire you work, then send me a quick comment to tell me how it worked out.

5 comments :
If there is anything unclear about this let me know, I did my best and the pics are so difficult to take close up in my BatCave!
every once in a while there is a revelation. this is today's. Who knew you could use piping like this. wonderful. now off to the Goodwill store to find something to experiment on. thanks for sharing and squeazing in with your camera to get the pics.
Thank you for this tutorial, I just bought packs of piping the other day as I would like to try putting them on my daughter's dresses.
Thanks so much Ladies really glad this tute will be of good use to you, sending some good sewing Karma your way!
You know, as much sewing as I have done, I should have already figured this out. Thanks for the tip, I will use it often, I'm sure.
Post a Comment