Showing posts with label Hand-me-down Horror. Show all posts

Saturday, May 28, 2016

DIY: Leather Jacket to Suspender Skirt

20160528_165024[1]  

Hey friends, totally glossing over the fact that I've been mostly absent for around a year. No excuses, let's just hug like old friends (the good type that doesn't hide behind shampoo bottles at the grocery store instead of speak to each other) the type that actually want to 'do lunch' and then really call each other to make plans. Let's be those friends xoxo


So I'm always crafty #youknowdis and, yes I'll admit to being a supplies hoarder, and by supplies I mean erm anything that could be made into anything, so yep my craft room is pretty hazardous to walk through. Bags of hopeful fabric here, well meaning piles of future awesomeness there, seriously people my craft room is like Mary Poppins bag x Dr Who's Tardis.  One day I will fall and meet my end, buried by a pile of old jeans or Upholstery samples, my friends will say with teary eyes, it's how she would have wanted to go.


20160201_092517[1]

In a bid to tackle supply mountains, I promised myself that if I couldn't find something amazing to do with a pile of 70's Leather trench coats then I would have to (GASP) send them on to a new home via Salvation Army. Only when I had given myself such an ultimatum did those creative cogs start whirring and the Suspender Skirt (Braces skirt back home in England?) was born.


I was totally inspired by the Leather Pinafore dresses all over Pinterest and originally that was the plan until I remembered that A, I am not Miroslava Duma and B, Leather Boobage is way too cool and sexy to be worn to wash my dishes or pick up the kids. So leather bottom half it is!


I even managed to keep the original pockets and buttons although I had to change the placement. Can you see where the skirt starts on the original Jacket? Yup it's the waist seam, then I just hoisted that bad boy up, took it in and fashioned the straps from the belt that came with. Since that only covered one strap I used the Leather jacket facing for the other side. I crossed them at the back and that was it.


20160528_164851[1]

So what do you guys think? 

What would you have made out of that Mans Leather trench?


Sunday, May 25, 2014

Refashion: Plain Gingham to Embroidered Loveliness


At the last Value Village sale I picked up a cute but very plain little Gingham dress for $2.50 for my little lady and just knew exactly what it needed, don't you love those simple refashions where you just know at first sight?


 Now my little one is a bit of a tomboy so it's a struggle to get her into anything without trouser legs, short of rolling her in a blanket and sitting on her. I showed this off to her the next day and she ASKED ME if she could try it on, and (gulp) she even wore it for half a day, yes it even lasted through two meal times which is an all time record. I failed to get a non blurry photo of her, (usual story) but the fact she wore it and loved it is a winner for me.

It was a quick turn around for this refashion, I know the stitching looks complicated to the untrained eye but it's nothing more than a handful of stitches. Running stitch, cross stitch and an easy peasy woven stitch. Yep super simple but it looks so fancy and adds a little vintage flavour to a plain expanse of Gingham.
 
If you're wondering what this kind of embroidery is it's called any of these names Chickenscratch/Broderie Suisse/Snowflaking and I absolutely love it. From afar the stitching looks like Smocking but it can be applied to a finished dress unlike Smocking which has to be completed first.
 
 
Want to see more of my attempts at Chicken Scratch? 
 check here for links to tutorials and here for more.


Anyone else notice that I did the stitching on the back of the dress? Good job it won't take me too long to do the same on the front too!

Monday, May 19, 2014

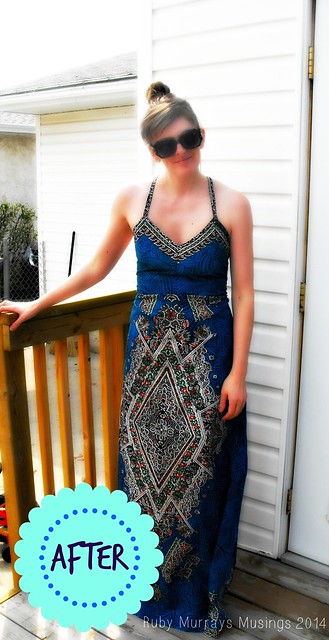
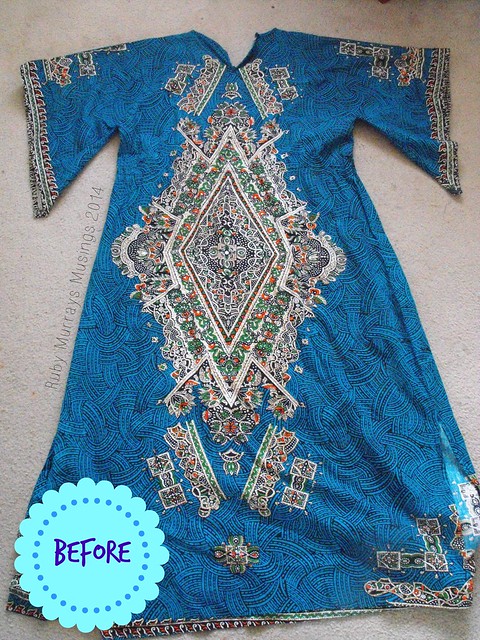
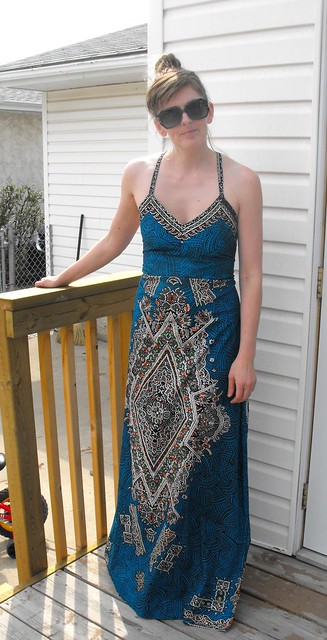
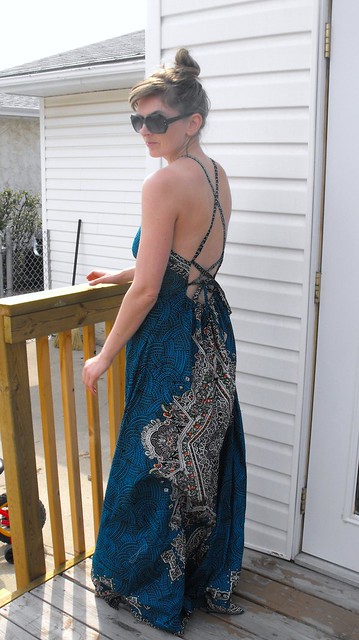
Kaftan to Maxi dress Refashion

Refashion
 
Refashion

I have been completely obsessed with my Me made May pledge, I've stuck to wearing a me made garment every day and even taken a (mostly crummy and sometimes headless) selfie for Instagram, which is big for me.  Every day seems like too often for me, I am just not a pc/laptop/social media every day kinda gal.

In fact if it's ever quiet around these here parts you know I'll be on a creative kick, hiding away rustling up something in my sewing room (formerly the 'lady cave' until I realised this sounds kinda, sorta, erm Gynaecological!) ok, (cue nervous giggle) moving on!

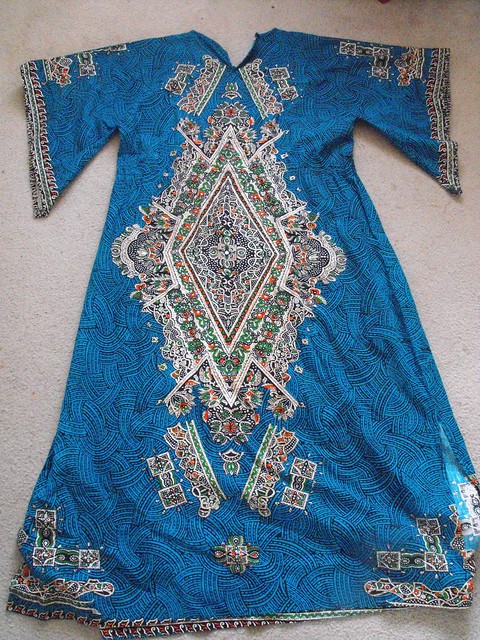
I picked up this beaute at a local thrift store for a princely sum of $5, now you know that I am super cheap so it must have spoken to me.
 
 
DSCF6641


DSCF6640

Excuse the awkward photos of me, Instagram has me on Selfie overdose at the mo, 19 days into Me made May and still haven't got into the selfie groove, hmm is that aging me? using the words 'selfie' and 'groove' in the same sentence? nah I'm still down with the hip cats :)

Ok wanna see the best bit about the dress? wait for it, wait...for...it
DSCF6639

DSCF6638

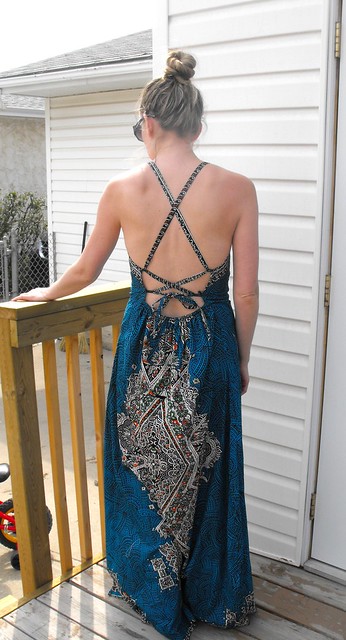
Bam! Party in the back!

Unnecessary bunching around the hem is me stepping on the dress, hubster is so reluctant to take a photo of me that I have to 'hop on it' anytime I think he might be willing.  He did pretty good, three shots and none of me a, looking like a troll b, sniffing or sneezing and only one unfortunate shot of me bending down adjusting my cleavage, all in all an A* for my man.
 
 
DSCF6597
 
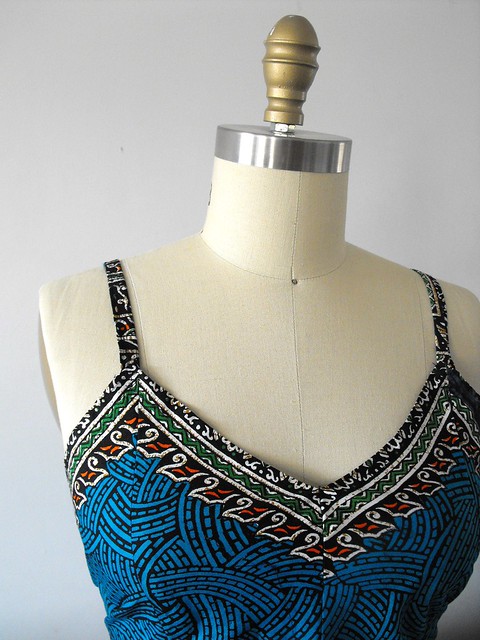
So can you see where I made the bust part from? The triangle sleeves worked perfectly when I hacked them off and used the underside seam, the straps were even reused as it originally had a waist casing score!

So what's next? some little girl sewing, if I can just wrangle my little Tasmanian devil into a non blurry shot in time for the next post.


XOXO

Saturday, September 7, 2013

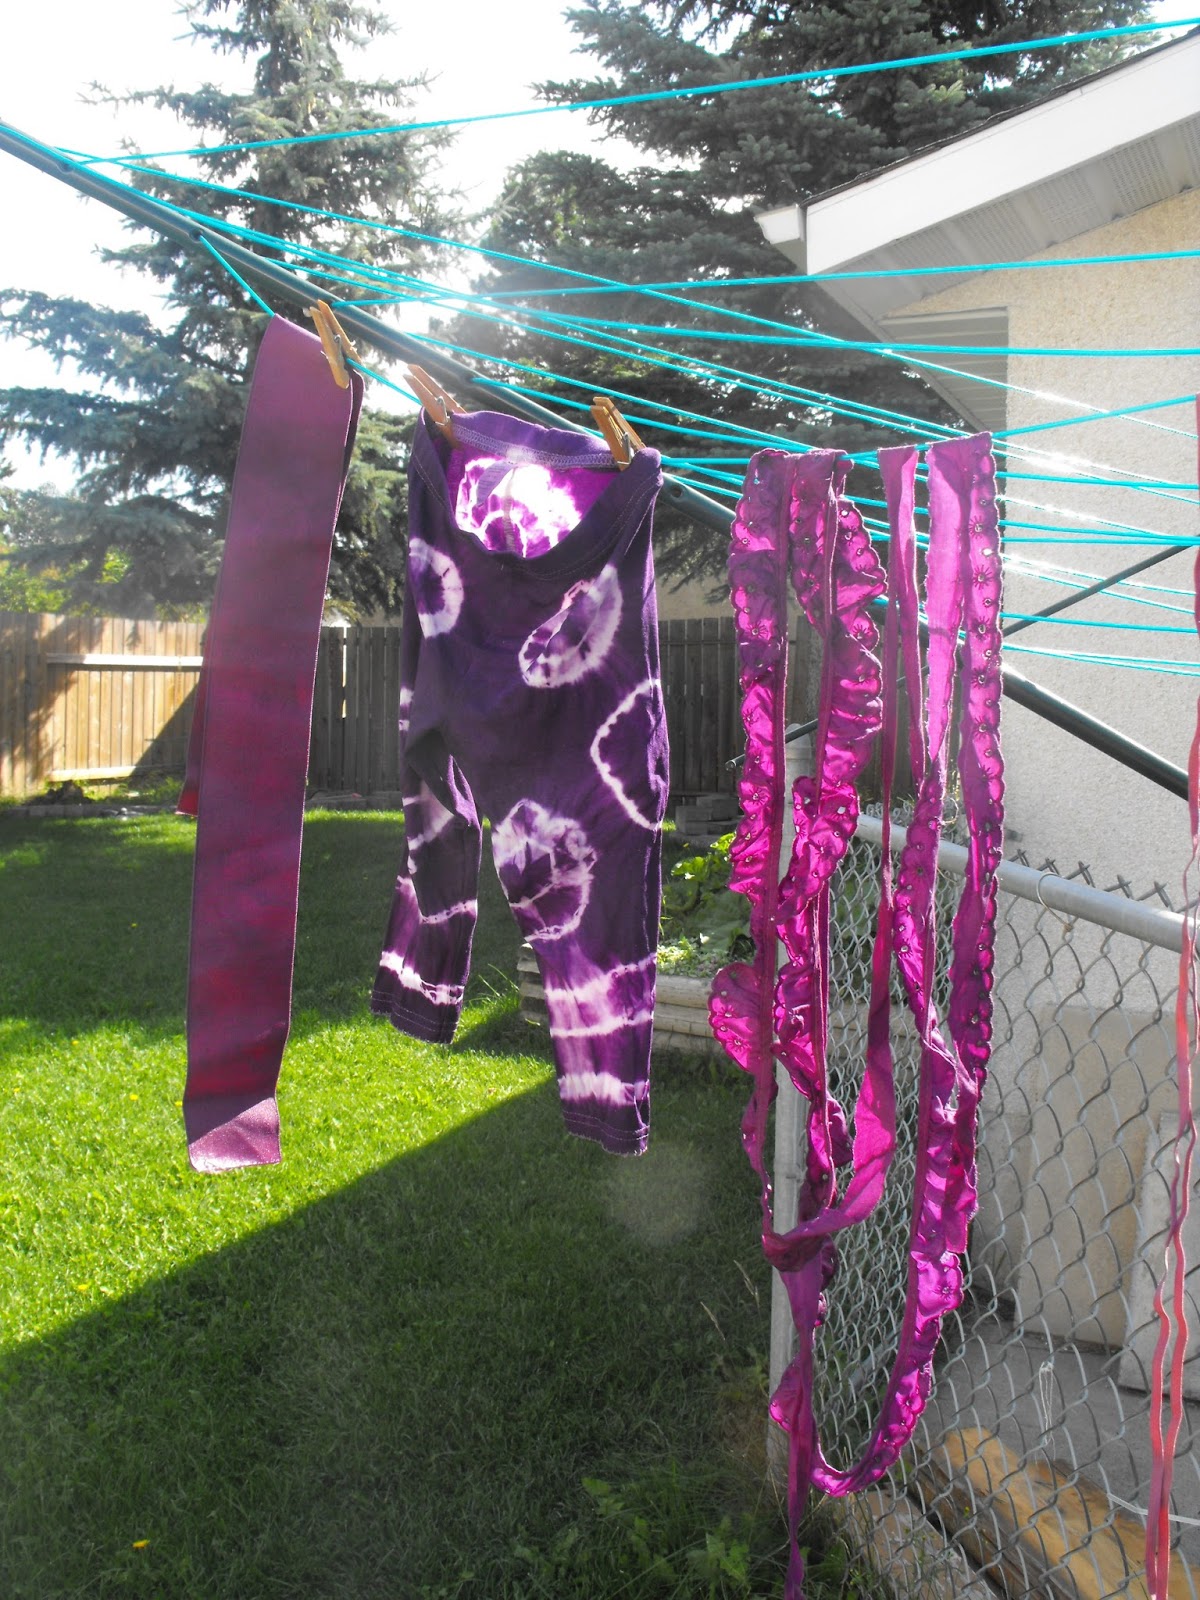
Refashioned Leggings - Getting down with Tie Dye

 
Braving the library and it's two mouse traps to bring you my last refashion, just some White leggings for my little lady turned Tie Dye awesomeness.
 
 
I'm an all out 70's chick, I'm absolutely obsessed with any kind of crafts from that era, so far Macrame has escaped my attentions but I'm literally one Pompom away from a Blue Peter badge that's for sure. There's something so magical about Tie Dye, it adds such a bold design and it's such a cheap and cheerful way to refashion something especially when you can pick up Tintex dyes at the Dollar store.
 
Strangely I haven't tie dyed anything since school, Sally Tipping and I had some Olive Green dye and went to town on some vests (Tank tops to my US/Canadian readers) I loved the outcome just not the colour, so technically I've never even worn anything that I tie dyed myself, and since these are for my baby girl this refashion is no exception.
 
 Tie Dye tips
  • For best results your fabric should be Cotton or other natural fibres (Wool/Silk etc) as they take dye best, Acrylic, Polyester and other Synthetic fibres will take on some dye but in a much lighter tone regardless of how long you leave it.
 
  • Make sure you leave the item in until the shade is darker than you require, when you wash out the excess dye it will lighten up and subsequent machine washing could also fade your handiwork so leave it in a little longer.
  •  
  • Use household string to tie up your designs, anything with a colour could bleed on your fabric so best stick to plain string.

  • Leave all your knotted pieces in until after you've washed the dye out

 
For Circles you just grab a piece of fabric, twist then tie, for double and triple rings tie again and again further away from the centre and your first knotted string. You can also add a stone into the centre of the fabric before twisting and tying, this helps keep the string in place.

 
For stripes going up the legs I just tied at random intervals with string as tight as I could.

 
The dye was such an amazing colour I couldn't resist throwing in some elastic and eyelet trim for another project, did you know you can dye elastic?


No modelled shots, I swear since my little girl learnt to walk, all photos of her are a complete blur, fingers crossed I can get some blog worthy ones shortly.


Ruby
xx

Thursday, August 15, 2013

Hand Me Down Horror Refashions - Don't call it a Comeback


Ok totally singing LL Cool J's 'Mama Said Knock You Out' after that title, butttt erm moving swiftly on.

I started this blog to give me a kick up the butt to get back to sewing and more importantly to refashioning clothing. It worked, I refashioned janky article after janky article, every day for the longest time I posted newly made over loveliness, but then a new house and baby number 2 came and before long refashioning too was on the back burner and my pile of clothing to refashion just got bigger.

Well not anymore, I've been threatening to resurrect HMDH for erm most of this year, so without further excuse making ;) here we go.

Thought I'd ease myself in gently to refashioning clothing again, I love love loved this sweater in the thrift store but it was kinda fuzzy and the shape was really not doing anything for me either. So I got to chopping and made myself this cute little clutch with some Denim scraps and trims I had in the Monster stash.

Kinda Aboriginal, kinda sorta Midwest, a lotta Geometric design and you know I love me some Red, White and Blue. Pom Pom trim? Rick Rack? Denim? bring it on, less is NOT more don't kid yourself ladies.

After Sweater refashion

So whatd'ya think? (looks down at feet and shuffles a bit) have I still got it?


Shared here


Recycled Fashion

Saturday, October 29, 2011

Ruby Ruffles up another Refashion!


I have a love/hate thing with Anthropologie, love their stuff, hate their prices, unless I am buying cloth spun from the hair of 50 Psychic virgins then I would just never ever pay their prices... EVER.

Anyway I was having a snoop through their dresses, and this one caught my eye, hate the colour and length, loathe the $560 price tag, seriously are you freakin kidding me?! the shoulder detail however I am in love with, I do love me some cutesy shoulder business going on.

Rows & Ruffles Sweaterdress


Cue me rustling about in my wardrobe and an hour later I had this, it just about fits over my enormous belly but I'll be wearing it after the babe is due too. I'm working on the Tute for next week but all it took was a pair of Dollar store zippers and a sleeve from a knit Sweater.


Although I added the ruffle zipper combo to the shoulders you could easily just make one and just stitch it to the front for a faux zip look, and because I didn't cut the original sweater if I tired of the ruffles I can just unpick them and wear the sweater as is.


Before shot, I didn't end up cutting up the Dark sweater, I found the original Long sleeves and made the whole shebang from one sleeve, talk about economical!

In case you were thinking that I was a Halloween bah humbugger, here are some of the photos of our Pumpkin, Noah couldn't wait any longer for the hubster to carve it and of course it had to be Curious George :)


Happy Halloween weekend folks, see you next week for the Denim Roses and tutorial for this badboy.

Tuesday, May 17, 2011

HMDH - The Return of the Smelly Hippy

Me looking away from the sun and looking like I have one leg, attractive non?

Smelly Hippy? no I'm not talking about me, really I'm not, no honestly it's the name of the refashion! Imagine it, the wearer of this, dancing around with bells on her ankles and reeking of Patchouli Incense sticks. It started off as a floor length skirt and yes I am aware that longer skirts are en Vogue right now but I've ignored many a style and not been stoned by angry villagers so I think I'm safe avoiding this one.

I cut into the skirt to make armholes then added an elastic cuff at the bottom for added smelly hippy chic then because the neckline was the old waistline and elasticated, pinching at stitching it to give a v neck made it fit properly and added a nice detail I think to an otherwise plain front. The stripes go a bit wonky because of the sleeves but who cares a belt round it hides this and cinches the waist for a more nipped in look.

This is so comfy and since the weather is gorgeous right now I can see myself getting many wears out of this one.


Before pic including bells and beaded threaded waist band
So how did I get back to the sewing machine without sewing standing up? last post I talked about getting a sewing table at a Garage Sale and lo and behold that same day I picked up the perfect sewing table for $2 at a garage sale, and a (boring but necessary) office chair to go with it, $7 all in, what a score!
Needs to be fixed up but it works for now.


Still need to figure out how to use my Dressmakers dummy without taking it up and down stairs for photos, but that's another days sorting out.

It's great to be back people.

Wednesday, April 27, 2011

HMDH - Romper Stomper


So finally I'm busting out another refashion, and this one I'm so proud of, it turned out so cute and finally the Spring weather is here so I can actually wear it without fear of Frostbite, Windburn and Hyperthermia (a real buzz kill!)

So I switched up the Romper to a dress using the tutorial I made for trousers to skirt, this was so easy and switched up the 80's look which I just cannot carry off at the Mum and Toddler groups to a more refined 40's look.

I added piping to the neckline, switched up the dreary buttons and cut the sleeves down and with a bit of trickery Bob's your Uncle a cutout sleeve, this is definitely going on my Tutorials list when things are back to normal after the big move. The sleeves look so much cuter on but I struggle to get a good photo of myself in this apartment.


Just in case you missed the original goofy shot, here is the original Kung Fu before pose, and nope I have absolutely no shame.


Hope it was worth the wait xoxo

Wednesday, April 13, 2011

HMDH 27 - We like 'em, we love 'em we can't get enough... PLEATS


This I've had in my stash for yonks (Translation: Donkeys years!) I loved the pleats and even the Peplum too but didn't like it all together, I fully intended on keeping the peplum but it ended up being ripped out and cut in half to make some quick and easy bias cut floaty sleeves. For a moment this almost became another sleeveless wonder, but I wanted to prove to those doubters out there that I also have some mean sleeve skills too ha ha!


OOh transparent skirt! totally reminds me of an American Apparel skirt I saw(through) the other day!


The sad before pic with it's too much business everywhere, pleats, nasty sleeves and a Peplum to boot? detail overload!

Talking of sad before pics, here's a rare goofy action shot of me, I felt that this Romper really deserved a few Kung Fu kicks before I got to work with the scissors! Can you believe that my husband looked at the photo in the viewer post shot and said 'I think you're going to hate this one!'

Stay tuned for this remake.

Saturday, April 9, 2011

HMDH - The Selection Pack!


I hesitate to call these Hand-me-Down Horrors since not much needed doing to make them cute, first up a gorgeous if not a bit 'churchy' summer dress, this needed the bust line lowering and thankfully once I'd carefully unpicked the sleeves and the shoulder seam I had another couple of cm's seam allowance to play with which lowered the cross over bustline and gave me more boob coverage, after all no-one wants a segmented boob paunch do they?

Secondly this fabric was so beautiful but I think the dress came from a tall ladies shop so I unpicked the waist seam, cut off 2 inches in width, gathered up the skirt and added an elastic casing, next up was the shoulders which were baggy huge and generally rubbish looking, this was an easy peasy fix, I just stitched down the seam allowance allowing room for some more elastic, this then bunched up the shoulders and made it a whole lot cuter.

These dresses both look gorgeous on but I shudder when I have to ask hubby to take photos of me, unless I'm looking for an extra 30lb's and two chins added he is never my go to guy for top photos, I swear my 21 month old baby Noah could and has taken more attractive photos of me!

Still the Spring is ever inching closer in Edmonton, we don't wear jackets anymore and although there is still on the ground, the Sun is shining and Doors and Windows can again be opened so no cabin fever feelings anymore. 


Closeup of the necklace which I made too.


Thrifted belt

Boring old before shot complete with an ugly fabric rose at the bust point and not much room for anyone larger than a AA cup to fit themselves into!


Before shot and close up of the beautiful fabric in exactly the same colours as it is in person, so pretty.

Have a great weekend, get youself to a thrift store and start chopping and stitching, I'm off on a thrifty jaunt in a sec.
Related Posts Plugin for WordPress, Blogger...
01 09 10