Showing posts with label Tree Decorations. Show all posts

Monday, October 7, 2013

Cross Stitch Christmas Tree Ornaments

 
Another Craftster swap inspired these gorgeous cross stitch snowflake Christmas Tree Ornaments, and yes I know it's not even Halloween yet!
I like to get crackerlacking with the Holiday season as early as possible, like perhaps Summer, and sometimes those same projects even get finished before the big day!


I have a real obsession with all things Red and White for Christmas and definitely need to make a whole set of these. The 70's girl in me could not resist throwing some mini pom pom trim on for good measure.
 
The pattern for the large (2 inch) Hexagon comes from
 Cross-stitch  by Dorothea Hall

The teeny tiny snowflake design is courtesy of my favourite Cross stitch book A Rainbow of Stitches by Agnes Delage-Calvet, if you haven't had a sneak peek at this book yet then head down to your library and give it a thorough thumbing to. It's chock ful of the sweetest, most delicate, vintage inspired as well as modern designs. All in one colour which really showcases negative space.
 I literally cannot get enough of this beautiful book, the photography inspires you to recreate every one of the projects and although the book features Embroidery designs too I much prefer the Cross stitch designs. My one criticism of the book is that it doesn't give amounts of floss required for the projects in the book. Since you're going to be purchasing one colour to complete the entire chart it's important to buy from one dye lot, if you don't know how many to buy how can you do that?


Two more tiny cross stitch snowflakes even smaller than Milk bottle tops! There was just enough Aida fabric left over after mounting the Hexagon to make both of these.

Some recycled and refashioned sewing on its way x

Tuesday, November 27, 2012

Best of British - Christmas Tree Decorations


Furiously crafting for Christmas? check out these cute tree decs, would love some of these on my tree this season.


Via. A Bit of home $7.99 (CAD)


Via Selfridges STG 5.95


Saturday, September 1, 2012

Salt Dough - Not Just for Christmas


They say that by embracing the activities you enjoyed as a kid Adults can de-stress, and by 'they' I mean Travis from Cougar Town, woah been seriously overdoing the Cougar Town recently.

So I've been rolling up my sleeves and getting my hands dirty with some Salt Dough Xmas ornaments as you know, and it turns out that there are some pretty cool projects on the web and not all Holiday themed either.

Here's my pick of Salt Dough projects from around and about.

First pic - The Desperate Craftwives - Starfish garland Tutorial
Love the beachy feel of the starfish, would love these as curtain tiebacks in the bathroom.

salt dough pendants


Floral may not be your style but using stamps or anything with texture the possibilities are endless and with one batch you could make trays and trays full of these, great for you craft market sellers and such an inexpensive medium you'd be Quids/Dollars in.

June, from Celtic Moon Craft if you're reading this, I would love to see you make these pendants in your beautiful Traditional Celtic style .
 
 
Oleander and Palm - Salt Dough Christmas Ornaments

Also a great idea for gift tags all year round, stamp names on for place settings, tie round napkins for handmade napkin holders, so many uses and who doesn't have a round cookie cutter and a few stamps kicking about.
 
Had to sneak some more Christmas projects in for those feeling me on the hurry up Winter front.


Thursday, August 30, 2012

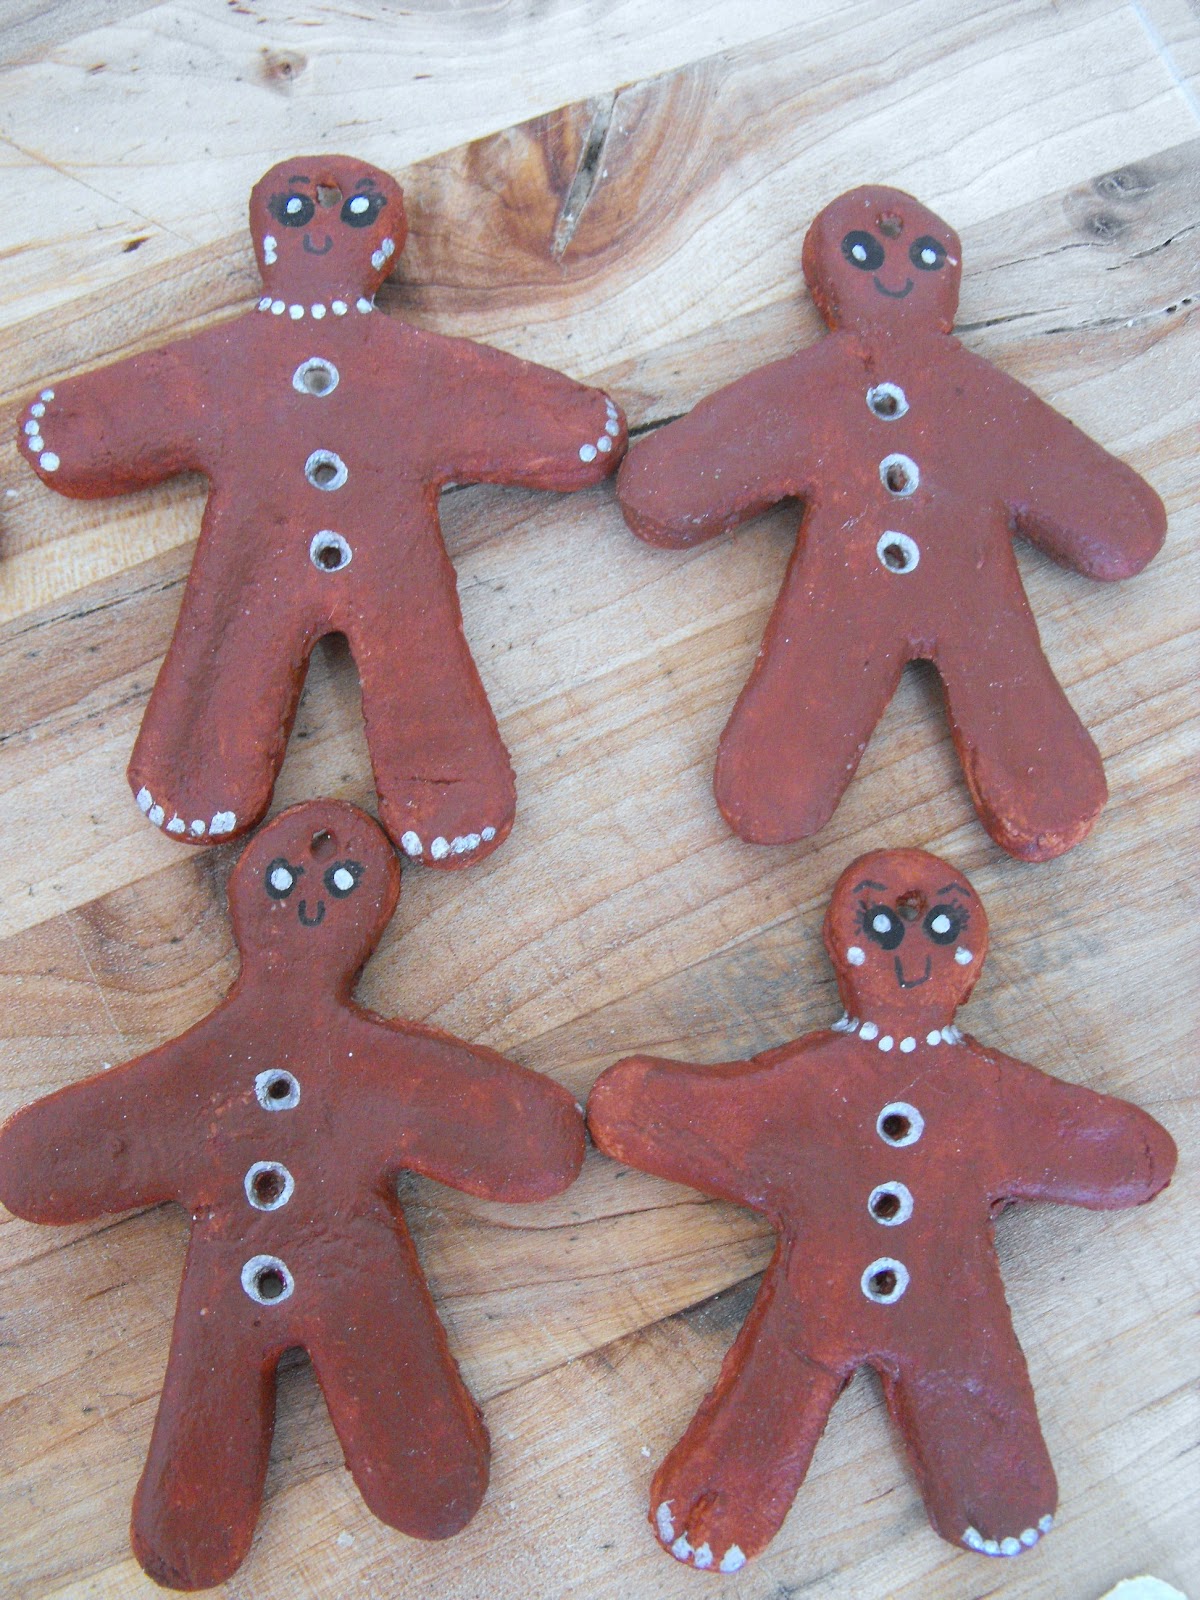
Salt Dough Christmas Tree Ornaments

 
Ok, ok you guys are sick of my Xmas obsession? well I made it so I'm sharing, family members look away please, these may or may not be winging their ways to you sometime snowier ;)
 
I had a lot of fun making these, I don't profess to know how to paint, so I'm going for 'rustic' looking, fun ornaments not works of art, if I can't get the look I want with a dot or a broad sweep of a paint pen/brush then it's not happening.


My personal faves, Gingerbread men and Ladies complete with painted nails and pearl jewelery ;)
 
My kitchen is literally like Santas Grotto at the moment so I'll be easing off the Xmas projects... for now.

Thursday, December 15, 2011

Xmas Decoration Tutorial - Beribboned Trees


I am a sucker for handmade tree decorations, they don't have to be fancy, clever or time consuming, just simple suits me fine, and they don't come much more simple or quick than these. I've been trying this year to use up whatever I can of my scraps and my stash of, well everything. I'm sure I've mentioned it before but I collect even the smallest pieces of ribbon from anywhere I see them, handles from falling apart Paper and Card Bags, from the shoulders of new clothes etc etc, so I have a ton of too small to be useful pieces of ribbon in every colourway imaginable. I kept them in a shoe box just waiting for some idea to make them useful again, until now.

What you will need for this Tutorial:
Sheet of Green Felt or other non fraying fabric
Scraps of Brown Felt or other non fraying fabric
Old Cereal Box
Hot Glue Gun or a decent white glue
Scissors
A roll of 1/4 inch Ribbon
Scraps of assorted Lace/Ribbon/Trim of all sorts
Sturdy Needle
Chop stick/Toothpick/Skewer (will save you from burning your fingers if using Hot Glue gun)


1. Start out by cutting a template for your Trees from your old Cereal box, mine were roughly 3 inches high by 2 inches wide you could do them all free hand but as you'll need two triangles for each decoration you want them to match. Cut an even number of these from your Green felt, if you want 6 decorations cut 12 etc etc.


2. Now for the fun part, take out your ribbon scraps and decorate your trees, in one colour, multicoloured, however takes your fancy. Glue them down and leave a bit either side to wrap around the felt piece.

3. When all ribbons are stuck down, flip over the piece and glue down the ends of the ribbon. Using the toothpick/Chopstick/Skewer push down each ribbon end until they are secure.

Here you see the messy back part and the front looking all tidy with loose ends tucked away.


4. Next up cut a piece of Brown felt for the tree trunk roughly 1/2 inch by 4 inches, add glue along the back and fold it in half lengthways.

 
5. Stick the tree trunk to the messy side of your Tree piece and cut another card triangle just a hair smaller than your felt piece. If you made a template at the beginning use this to trace around then cut it smaller, trace the new smaller piece for other decorations, you need one for each tree. Take an undecorated triangle of Green felt and stick your smaller card triangle on to it, there should be a gap around it.


6. Glue both pieces together, making sure you seal up the edges (glue then press together) to stop the card showing. Next up Marvel at your creative skills then take a ribbon, thread your sturdy needle and pierce the top of the Tree (making sure you are poking the needle through the card), pull the ribbon all the way through and tie in a double knot. Knot the ends furthest way from the tree together to then hang your tree decs.


Done.


Other Ideas:
Make these as cute Gift Toppers, with Ink just stamp the persons name across one of the ribbons.
Then add a Card stand to the back and they could be Place cards.
pr leave as is but attach to the front of a card (using foam adhesive tape) for a reusable Xmas memento.

Hope you enjoy making these, I just kept going until I ran out of all my Green Felt leftover piecess.

Related Posts Plugin for WordPress, Blogger...
01 09 10