Showing posts with label restyle. Show all posts

Friday, March 18, 2011

Refashion Tutorial 4 - 10 Minute Trousers to skirt

I can't believe I've never done this one before but I think you're going to like it, it's so quick and easy, no measuring just snip, sew and Bob's your Uncle a cute skirt from a hideous pair of Clown trews (trousers/pants) and when I say you can do this in 10 minutes this is a very comfortable 10 mins, no pedal to the metal sewing needed.

What you need:

Clown Trousers (must be baggy in the legs, light flowy fabric with a busy pattern, but a good fit on the waist)
Seam Ripper
Scissors
Sewing Machine


1. Turn Trousers inside out and unpick the inside seam, this is the seam that runs from your ankle, up your leg and down the other leg.


 2. Open your trousers out to look like this, the tag is the back of the Trousers and the seam in the middle is your side seam.


3. Take a straight edge (honest no measuring) and draw a straight line in pen/chalk, from just above the crotch part (the weird triangle shape in the photo) it doesn't need to come to a point at your hem just a few inches up is fine. Repeat this for the other side.


4. Cut this part off and repeat for the other side, see it's already looking like a skirt, excuse the double vision!
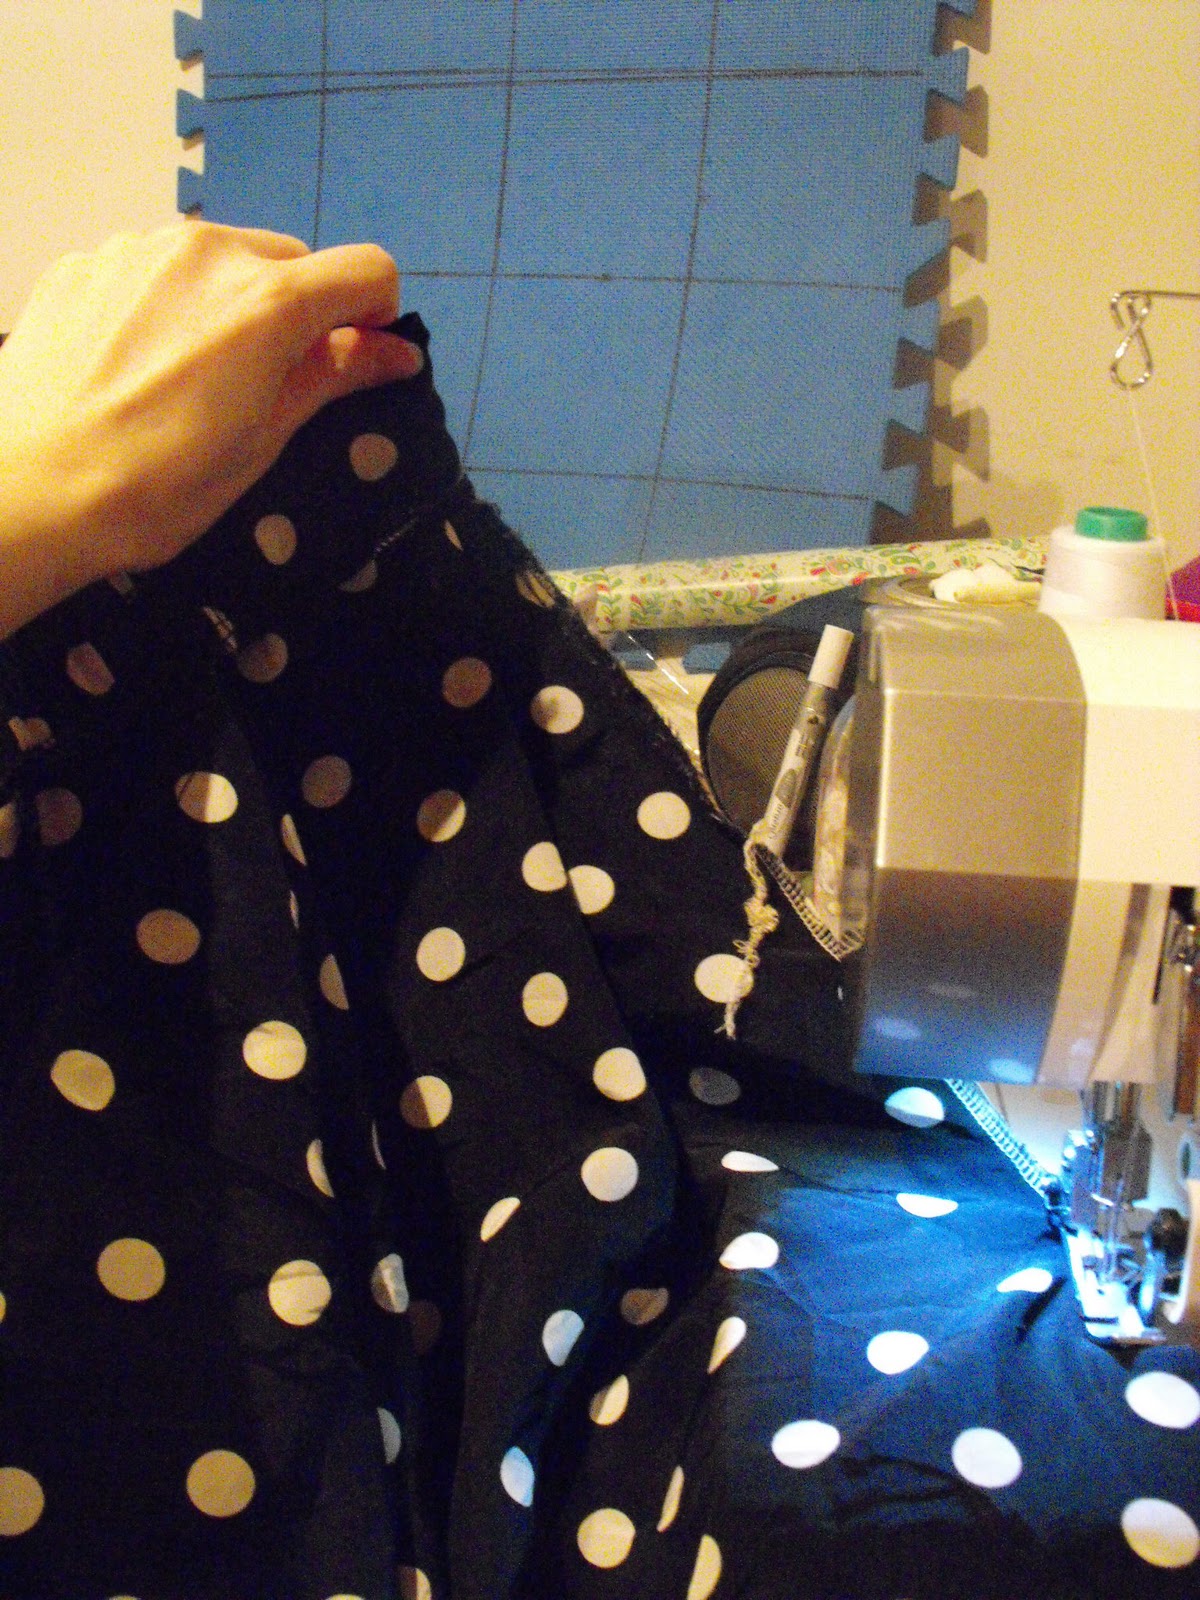

5. Take the trouser/skirt hybrid to the sewing machine (I used my serger here but a sewing machine is equally good) and sew up the sides you've just cut. To make things easy start with the side with the back label on, then you'll know you are sewing the right pieces together. Repeat this for the other side.

Skirt all sewn up


How it will look inside out (this is the back of the skirt facing you), notice that you've made a new seam down the middle of the back of the skirt? well you made one at the front too. If you had a plain skirt then this would be more noticeable but this busy print and pleats at the front completely disguise this skirts humble beginnings.


Now this skirt would be too long for me and yes I know that longer hemlines are back but I can't pull them off so I chopped off the skirt to knee length then hemmed it.

If you're looking for a long skirt and the new skirt is the right length then you just keep it as is, you won't even need to hem it. Magic!

As usual the final and most important step is to send me a lovely message of thanks, and/or flowers (Lilies) or Belgian Chocolates, what can I say I have expensive tastes in gifts if not in clothing :)

Monday, February 21, 2011

Hand-Me-Down Horror 18 - Test page halterneck


So I had a hair disaster yesterday, I went in with my fringe pinned to the side and looking awful and just for the heck of it the girl cut my hair as it was, brushed to one side, so I have some fringe that reaches my nose and some that doesn't cover my eyebrows. It looks a right royal state. So to cheer myself up I threw myself off the wagon and bought more goodies to refashion, I know, I know, how naughty!! I spent a wopping $8. Yowsers!!

This was a one night project, and I totally broke all the rules and used the fabric with the grain going straight across so I had to put some elastic at the bottom to feign some shape,  but me and my wonky fringe are in love with it.


So I added a collar to the front, elasticated the back, then bias taped the bottom and added elastic to it to puff it out a bit. I based it on the HMDH 1 and I think it worked out pretty successfully.


The icky before shot


Hope you like it peeps <3

Tuesday, February 15, 2011

Hand-Me-Down Horror 15 - Trompe L'oeil

So this one took slightly longer than usual, mainly because I kept changing my mind about what I wanted it to end up as!

Originally it was just an uninspired button up short dress in another tropical print reminiscent of a cruise wear collection ick ick ick .

I chopped off the collar and sleeves (one day I'm going to show you I can work with sleeves too y'know) took it in, carried on the bust darts all the way to the top to make it a princess line bodice. I used the sash to make the straps, bias taped the top and made a faux waistband just using baby rick rack, I also made a faux collar by adding rick rack in a collar shape the neckline. I think this turned out even cuter than I originally planned.

Excuse the very dodgy photo of me, it's a sad day when I have to rely on my hubby to take a photo of me but the dress form is too busty for this dress. It's the only photo where Noah wasn't trying to look up my dress, charming hey!


Sunday, February 13, 2011

Hand-Me-Down Horror 16 - The Bountiful Sweater

Ok so I fell off the wagon, I totally caved in and went to my beloved $1 thrift store and spent a wopping $17, and it would have been $19 had it not been for my frequent shopper card giving me 2 free items/$2 off.

I met up with the delightful, delicious, delovely JDawg for an out of the house jaunt and ended up getting some new fabric and two bags full of goodies/fuglies to refashion, I just couldn't help myself. I'm going to start again and not completely give up on my no spending pledge though, just bear with me.

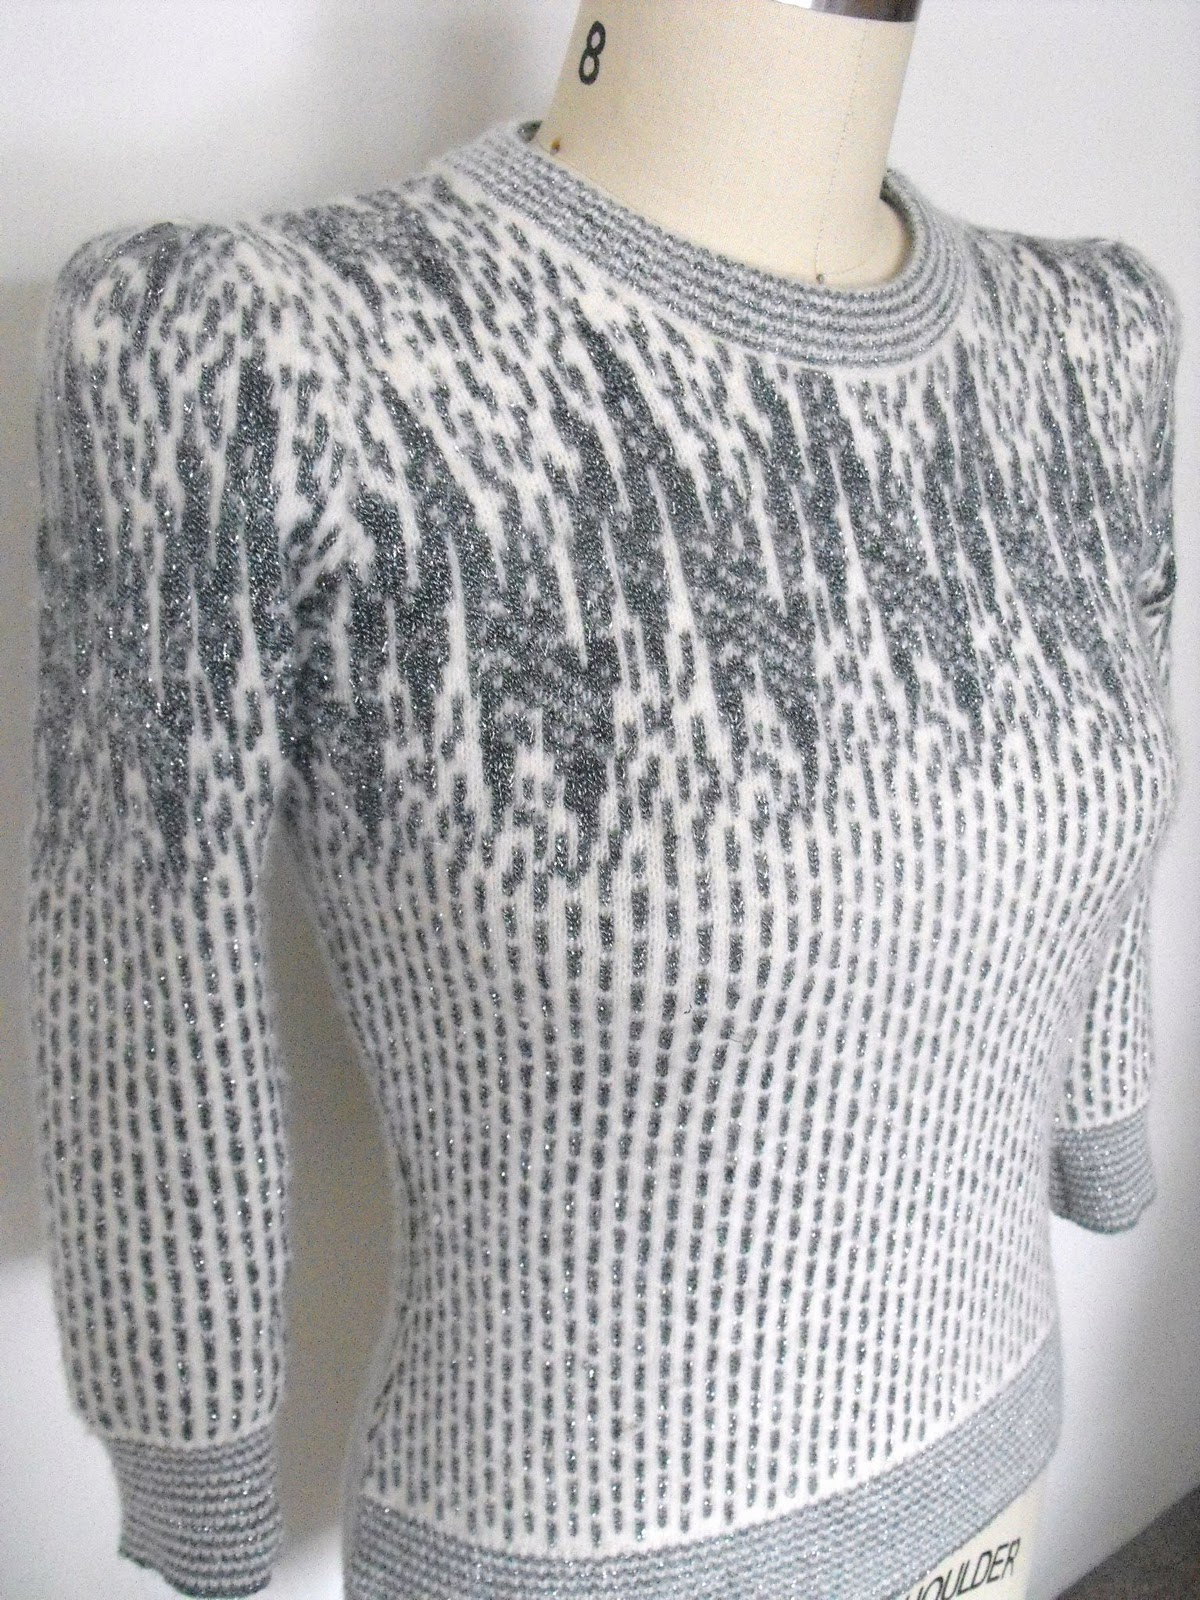
So this is a Mohair sweater, hand knitted from what my limited knowledge of knitting tells me and you probably can't tell in the pics but it has gorgeous metallic thread in it and 40's style gathered sleeves for extra added pouf! It was hideously baggy and yuck though so I took it in. It was an easy peasy fix, I just traced around a sweater that fits, one that has the same level of stretch (that bit's important) then with a tight zig zag stitch on my sewing maching I just followed the lines I'd made, then cut the additional sweater away, job done.


The bonus part of this project was that the extra bits I'd cut away made two cute brooches which I could pin to my jacket or the sweater!


Forgot to extend the shoulders for this photo Ooops


Uninspiring before shot.

Friday, February 11, 2011

Hand-Me-Down Horror 15 - Sneak preview


Now, this is a pretty regular looking shirt dress nothing too hideous about it, it just looks like something my old school teacher would wear, yuck!

It looked awful on though as is, but it was Cotton, in good nick, the fabric was summery and it only cost $1  so I threw it in my basket sometime last year, thinking that at some point I'd be hit by a thunderbolt of inspiration!


Check back soon for the transformation

Thursday, February 10, 2011

HMDH a story of Love, Obsession and errrrr Mothballs...

So this Hand-Me-Down Horrors series has literally taken over my life, I can't eat, sleep, or bathe baby Noah without thinking about my next fix, the design, style, fabric, colour. My Dining table is once again covered in all kinds of sewing projects and my pledge to finish off 2 wip projects before starting one new has totally flown out the window I am completely and utterly obsessed.

I never really intended for this blog to be about fashion at all. I have a love hate relationship with fashion blogs, frankly I find the concept of someone telling you what is hot and what is not a little patronising, it's the same reason I am not into organised religion. I don't lead a Rock N Roll lifestyle, neither am I a drinker nor a druggy, yep sorry folks, I'm more Saffy than Patsy these days (Ab Fab reference) but I still like to know that I have the option to abuse myself in that way, so for that reason religion would totally cramp my style! 

I digress, style for me is totally about what works for you, what makes you smile and the way you feel when you know that you look good, not what is on the cover of Vogue, or what is in the stores at the moment. If you truly have style you just know what looks good on you, it's just about making it work and rocking your outfit whatever you're wearing, fashion is fleeting, style is eternal (Coco Chanel)

So I'm gonna keep on keeping on with Hand-Me-Down Horrors, (amongst other projects) I love doing the transformations and short of a full scale intervention I really have lost all control over my ability to stop anyway.

So to my 23 followers and to the near on 6000 views I've had I'm hoping that HMDH has not become your drug of choice... ok so maybe I do just a little.

Wednesday, February 9, 2011

Hand-Me-Down Horror 14 - Rainbow Bright


I know it seems like I've been changing up a fair few skirts recently... and that's because I have! but seriously I'm working away on some refashions that require a bit more of a tailored finish, so all the time I can keep churning out the cuteness and work on the tough stuff at night I will do.

This was sat in my wardrobe begging to be reborn as something wearable, the waist fit me but the boob coverage left a lot to be desired, and quite frankly I'm not sure just how comfortable Alberta is with public nipplage.

Cue the seam ripper, my trusty wide elastic and bobs your uncle, the cutest most summery skirt that I cannot wait to wear. I almost wore this outfit round the house today even with 2 foot of snow outside.

I don't know why I've steered away from redoing skirts in the past, admittedly it was a little fiddly making the waistband pucker free, but I did accidentally cut the waistband an inch too short so I had to do a bit of magic on it before it would fit and look good.


 Hope you like it peeps, and roll on summer that's all I can say!

Monday, February 7, 2011

Tutorial 2 - No hem 10 minute skirt from Mumu/Dress

So here it is, easy peasy skirt even if you don't sew this is a cinch, I used a mumu for this but you could use the same tutorial to make a childs skirt from an adults dress/skirt and as you'll need less width  you could even use a slimmer fit skirt.


Chop off bottom of dress, making sure it's long enough for your tastes and roughly 1.5 times your hip measurement, just hold it against you don't bother measuring.

Grab some wide elastic (this is 3 inches wide) wrap it around your waist (wherever you want the skirt to sit) and overlap it slightly (2 cms approximately) then cut it.


Now for your easy peasy waistband, overlap the ends of the elastic, at least an inch. I overlap more than I included in the original estimation to allow for easing up of the elastic with wear, you don't want it to go baggy. 

You don't need to stretch the elastic as you sew but you'll need to use a zigzag stitch, a regular stitch length of 2.5 will do. Now stitch the overlapped ends of the elastic, I did this 2 or 3 times about 1/2 a cm away from each stitch line. You're just trying to make sure that the elastic stays together and sits flat with no flappy ends.
 
See it sits flat!


Next you need to make the skirt piece the same width as the elastic, so with a long stitch length (I used 5mm) and roughly 1cm away from the raw edge stitch with a straight stitch, don't get hung up on sewing too straight, these are just gathering stitches. Once you've gone round once, cut the thread (leaving a couple of inches) and stitch round again just to the outside of the original stitch line.


Grab a seam ripper and lightly pull on the stitches starting at the start/end point, this will start to gather the skirt, line up the elastic with the skirt and keep pulling on the stitches until the elastic and skirt are the same width. You want the gathering to be even around the skirt.


Now pop the elastic waistband over the top of the skirt as below. For neatness sake line up the elastic waist join with the side seam of the skirt piece. If you stitched the elastic together properly it should sit flat both sides so it doesn't matter which side is facing the skirt as you sew.

Now stitch the waistband to the skirt with a zigzag stitch again, I just stitched over the two gathering stitch lines you made initially. Stitch all the way round and continue stitching a little over the starting point, back stitch for a couple of stitches then you're done with the sewing.


This is what it will look like


Now you need to remove the initial gathering stitches, I'm lazy so I stretch the waistband of the skirt which will pop the straight stitches (because straight stitch is NOT a stitch you should use on stretchy fabric except for gathering) you can then just pull out the stitches with a seam ripper or they will show as below pic.


Last step flip up the waistband and the raw edges of the skirt will be inside the skirt, and since you've used a hemmed piece of fabric your skirt is done.


I'm a busy Mum and make these tutorials instead of catching up on much needed sleep so if this is useful to you be sweet to me and just leave a kind word of thanks.

Hand-Me-Down Horror 13 - The Twofer

So this one was long and pretty shapeless before but really I didn't do much to it and I think it ended up cute and wearable, and of course the two pieces from one is a bonus too!


This is the sister Mumu of the Bouquet du Mumu skirt, yep same print, same dress, bought at the same store on the same day both unworn, crazy huh?


So you're wondering where the name comes from? Twofer? well in cutting the ankle length dress I was also able to make another (matching) elasticated waist skirt. Two for one!


Since this was the bottom of the dress it was pre-hemmed so this has to be THE easiest skirt to make, stay tuned for a tutorial for the no hem skirt coming soon.

Related Posts Plugin for WordPress, Blogger...
01 09 10