Showing posts with label Leather. Show all posts

Saturday, May 28, 2016

DIY: Leather Jacket to Suspender Skirt

20160528_165024[1]  

Hey friends, totally glossing over the fact that I've been mostly absent for around a year. No excuses, let's just hug like old friends (the good type that doesn't hide behind shampoo bottles at the grocery store instead of speak to each other) the type that actually want to 'do lunch' and then really call each other to make plans. Let's be those friends xoxo


So I'm always crafty #youknowdis and, yes I'll admit to being a supplies hoarder, and by supplies I mean erm anything that could be made into anything, so yep my craft room is pretty hazardous to walk through. Bags of hopeful fabric here, well meaning piles of future awesomeness there, seriously people my craft room is like Mary Poppins bag x Dr Who's Tardis.  One day I will fall and meet my end, buried by a pile of old jeans or Upholstery samples, my friends will say with teary eyes, it's how she would have wanted to go.


20160201_092517[1]

In a bid to tackle supply mountains, I promised myself that if I couldn't find something amazing to do with a pile of 70's Leather trench coats then I would have to (GASP) send them on to a new home via Salvation Army. Only when I had given myself such an ultimatum did those creative cogs start whirring and the Suspender Skirt (Braces skirt back home in England?) was born.


I was totally inspired by the Leather Pinafore dresses all over Pinterest and originally that was the plan until I remembered that A, I am not Miroslava Duma and B, Leather Boobage is way too cool and sexy to be worn to wash my dishes or pick up the kids. So leather bottom half it is!


I even managed to keep the original pockets and buttons although I had to change the placement. Can you see where the skirt starts on the original Jacket? Yup it's the waist seam, then I just hoisted that bad boy up, took it in and fashioned the straps from the belt that came with. Since that only covered one strap I used the Leather jacket facing for the other side. I crossed them at the back and that was it.


20160528_164851[1]

So what do you guys think? 

What would you have made out of that Mans Leather trench?


Thursday, March 21, 2013

Jil Sander DIY Leather Paper Bag


Mama's got a brand new bag, yup I'll be Brown bagging it in style! or at least I would be if this wasn't a gift for a too hip Teen across the border.


Have been loving the Paper bag Leather clutches from Jil Sander recently and I just happened to have this brown paper bag looking Leather in my oh too enormous stash so I got busy. I added some extra stitching to what would usually be fold lines on a paper bag, to give the bag more structure, it worked a treat and gave it enough form to stand on its own.


All folded ready for another day.
 
 This was a quick easy sew even using Leather, a few missed stitches but overall nothing too disastrous. The whole bag takes a simple rectangle and it could easily be made by repurposing an old Leather skirt, got a pair of Trousers in your refashion pile? even better.
 
I have a Tutorial in the works for this, cruising my beloved Pinterest for Tutorials the only ones I could find were using glue and were a bit too basic for what I wanted so look forward to that my lovelies.
 
Sssspppppeaking of refashions, remember once upon a time I used to refashion clothing? like a lot? you didn't? check out my Hand Me Down Horror series HERE and just keep on scrolling.  
 
Wellll I'm back on it, I have a huge pile to refashion and a year on from my gorgeous girl being born I seriously need clothes without suspicious shoulder dribble stains, so I'm back on the sewing machine and getting snippy with it.
 
Watch this space ;)

Sunday, February 26, 2012

Leather ruffle necklace at P.S I made this

Not dropped off the face of the planet, still crafting away furiously but time at the old wind up pc is in short supply without a Toddler using me as a climbing frame and switching off the pc mid post, that and a rapidly growing baby nursing me into sleep mode!

Here's a Leather jewelery tute I've been meaning to try since it popped up on my radar last year. Hope you enjoy and I'll be blogging about my own crafty endeavours soon enough.

Don’t you wish every day could be a FRYE-day?  Known for their high-quality materials and hand-craftsmanship, The Frye Company has been around since the mid 1800’s (holy heritage!)  Frye crafts what are quite possibly the world’s most iconic boots, along with a bevy of luxe leather must-haves.  Fun fact: It takes more than 190 steps to make one pair of bench boots.  P.S.- CLICK HERE to see how Frye boots are made, and check out pics from our live DIY EVENT at their NYC Flagship store.  We DIY’ed our hearts and soles out this week.  Now read on to learn how to make your own luxe leather necklace!
To create: Use scissors to cut a piece of leather or leather-like material in a rectangle that’s approx. 12” x 4”.  Cut the bottom, giving it a wave-like shape. Punch holes spaced 1-inch apart using a leather hole punch.  Get creative and weave in cord, metallic beads, or other hardware accents.  P.S - we used actual eyelets from the Frye warehouse. To finish off, knot the cord and you are ready to sport this must have fall accessory. 


Love this idea, again great for scraps, it's girly and it looks easy peasy lemon squeezy (yep I'm bringing that saying back folks!)I never seem to be able to find those crazy looking fabric punches so I'll be trying mine out with a regular old paper punch and squeezing the hell out of it.

Saturday, December 10, 2011

Creative Gift Wrapping Ideas - Bows

I just can't help myself, I am a sucker for bows of all types, on everything, made of anything so the lovely creature comforts blog, yup again got me thinking about all of the different types of paper you could use to make this lovely paper gift topper bow.


I would love to see this made with pages of sheet music, cartoons, old Atlas pages, any old book pages, and how simple but perfect that the tails of the bow act as a gift tag, genius.

Please check out this tutorial and several more gift printables, a chain link garland and the most adorable bird printable wrap.


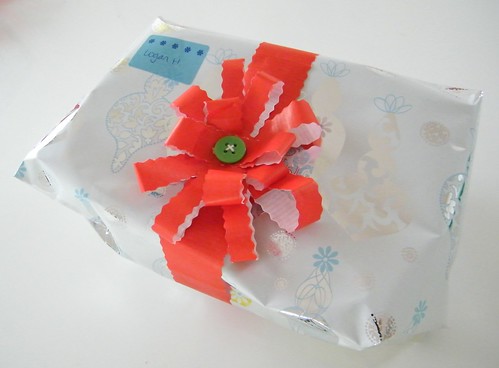
Made from leftover bits of gift wrap and a button too, perfect last minute-ran out of everything gift topper, and otherwise what do you do with those too small to be useful pieces of wrapping paper?


Ever wondered how to make these posh looking ribbon gift bows? check out this tutorial using of all gadgets, the humble embroidery hoop, bloody genius I hate the idea of going out and buying a specific tool to make these (one which I probably would not be able to work out with enlisting the hubster!) Stay awhile and check out Lines across my face, it's a great blog with some lovely ideas, check out her Felt Xmas Trees Tutorial(I've made a ton of these and just need to decorate them)


If you're a newbie crafter you could definitely do worse than make some of these for Xmas, why pay for them at stores then throw them away afterwards, make these out of anything paper from Music sheets, newspaper, comics etc. I love the idea of matchy matchy paper gift bow on wrapped present, esp newspaper or brown paper, you could get away with either of those for boys right?


Can't get these newspaper wrapped gifts out of my head courtesy of Sustainable baby steps thanks to Reduce Reuse Upcycle  for featuring the idea (lots of seasonal earth friendly projects here). Don't have a daily or free paper where you live? check out the library for a selection of free foreign language newspapers or use magazine paper.


And lastly just because I simply refuse to kick the Leather fascination (I swear 99% of my gifts have been made of repurposed leather this year) here is a gift bow made of Leather, it does require some tooling but I think you could easily follow these instructions using a lighter repurposed leather and a glue gun, it won't be as stiff as the hide used in the photo but you won't need any extra gear. This could be attached to a brooch back as a seasonal (or cute as heck all year round) extra gift.


Hope some of these amazing bloggers have offered up some food for thought and got you inspired to make wrapping a creative part of your Xmas, I love the idea of playing around with colours, unusual materials and textures, rough on smooth,  and also the idea of scale, teeny tiny bow on a Large gift? or great big gift topper on teeny tiny gift (like my Crocheted Rose), have fun and use what you have laying around.

Got some more ideas from around the web coming up, and also a Tutorial for a Xmas tree decoration that requires no sewing and could help you clear out your scraps bin, and an extra cute felt & recycling project I just finished that is almost too cute to look at without glasses.

Tuesday, October 25, 2011

No Scraps Left Behind - Leather Round up

Wowsers I may be the only one but I've had a blast messing around with Leather, I'm drawing this theme to a close now and have some more great posts coming up on Denim, Cooking and even another a refashion Tutorial, seems like ages since I've sewn anything to wear and can't wait to share with you.


Poppytalk - Cowboy Boot to Wallet

I've purposely stayed away from anything that looks too technical but this I love, can't see myself cutting into a pair of boots to make a Wallet but I would love to own one of these, so cool and what a great refashion.

Photobucket

Love-aesthetics - Leather Envelope Clutch Tutorial

Easy peasy clutch, a cut and stick ready in a jiffy kind of project but a great gift idea.

[Finished (4)[5].jpg]

Stitch in My side Leather/Suede Flower Necklace Tutorial

I'm going to be keeping and eye out for any cool Leather projects and posting about them sporadically so if you couldn't beg, borrow or steal any Leather this time, keep checking back for more great posts from around the web.

Sunday, October 23, 2011

No scraps Left Behind - Leather Mini Cuteness Tutorial 3

Ok call me obsessed but I still have a shed load of Leather scraps and then it dawned on me that I had an 80's monstrosity in Red Suede so I've been carving a path through that this weekend.

Inspired by this super duper miniature tutorial Bored and Crafty - Mini Satchel I got busy with some teeny tiny pieces that were quick to make and would make such cute Christmas Brooches, gift Toppers or just Xmas ornaments and yep, still on the Christmas jag!


1. Make a pattern on card for your Mittens, I suggest making it no smaller than mine which were 2 1/4'' long and 1 1/4'' at the widest point (the thumb piece), any smaller and you're going to have trouble turning it . Cut out the pattern from a piece of suede/suedette/Leather/Vinyl, whatever you have on hand, making sure to flip the pattern piece for two of the pieces.


2. Putting right sides together, stitch carefully as close to the edge as possible, back stitch to reinforce at stopping and start points.

 3. Cut closer into the seam allowance if you have some wide areas, then cut up to but not throught the gap between the thumb and the mitten. Then cut teeny triangles out of the round areas this will help when you come to turn.

4. Before turning right side out, ensure that you have no holes in the mitten, it's easy to cut too close or through the stitches so you'll want to check for this now and stitch up those areas.
Then poke your finger into the mitten turning the finger ends inside, keep poking and wiggling until it's the right way out, using a hairpin will help to tease the thumb piece out. Keep playing with it until the edges are nice and round. 


5. No one likes a lost Mitten so pop a piece of ribbon 2 inches long inside one Mitten and stitch closed, following the pic below pop the other end in the other Mitten and stitch closed, you want the thumbs to be facing when they're finished.


6. Now for the fun bit, with some Lace and hot glue, glue the Lace to the centre of the back of the Mitten and bit by bit glue and wrap the Lace around it until it meets the start point, you'll want to hide your stitches and leave a little over the edge for decoration.


Hold those teeny tiny Mittens in your hand then realise that everything looks cuter with a bow. Cut a strip of your fabric and tie a tiny bow, using a pin to help you, glue it on, revel in the tiny cuteness.


Just for fun here is the 'donor' of all this lovely red Suede, amazingly this looks worse on, I's have trouble getting through doors head on!

No Tute for the teeny tiny Clutch, however using the Tute linked to above is a great starting point then have fun.

Ok have fun with the rest of your weekend and if you liked this Tutorial let me know :)


Photobucket

Thursday, October 20, 2011

Teeny Tiny Leather Spell Book Tutorial


Was it just me that as a kid thought that the Macbeth Witches speech went as follows: Hubble Bubble Toilet Trouble? what a dufus hey!

Ok finally got round to posting this in time for you to make a cute mini spell book for Halloween.

What you'll need:
Small piece of scrap Leather, the more wrinkled and aged the better
Small scrap of Cardboard (Hard back of a notebook would do fine)
1 piece of printer paper
Scrap of decorative Paper
1 O Ring
Gold Sharpie Pen (permanent marker)
Scissors
Hot Glue Gun
Bull Dog clip/Bag clip
Needle (to punch a hole)
Yellow Pages (to lean on)


1. Take one piece of printer paper (A4 if you're in the UK) cut it into 1 inch slices along the width of the paper. Divide the paper up into 5 smaller pieces which should measure roughly 1& 3/4 inches  across. I used N.American sized paper which I know is different to A4 so you'll have to play around with the sizes. Make a big pile of these rectangles then fold them in half and squeeze them with a bag clip/bulldog clip. All of the folded 'spines' should be facing the same side and that side should be poking out of the clip.

2. From Cardboard cut 2 rectangles, 7/8ths of an inch by 1 1/4 inches, these will be the front and back of the book,the spine should measure roughly 5/8's by 1 1/4 inches.
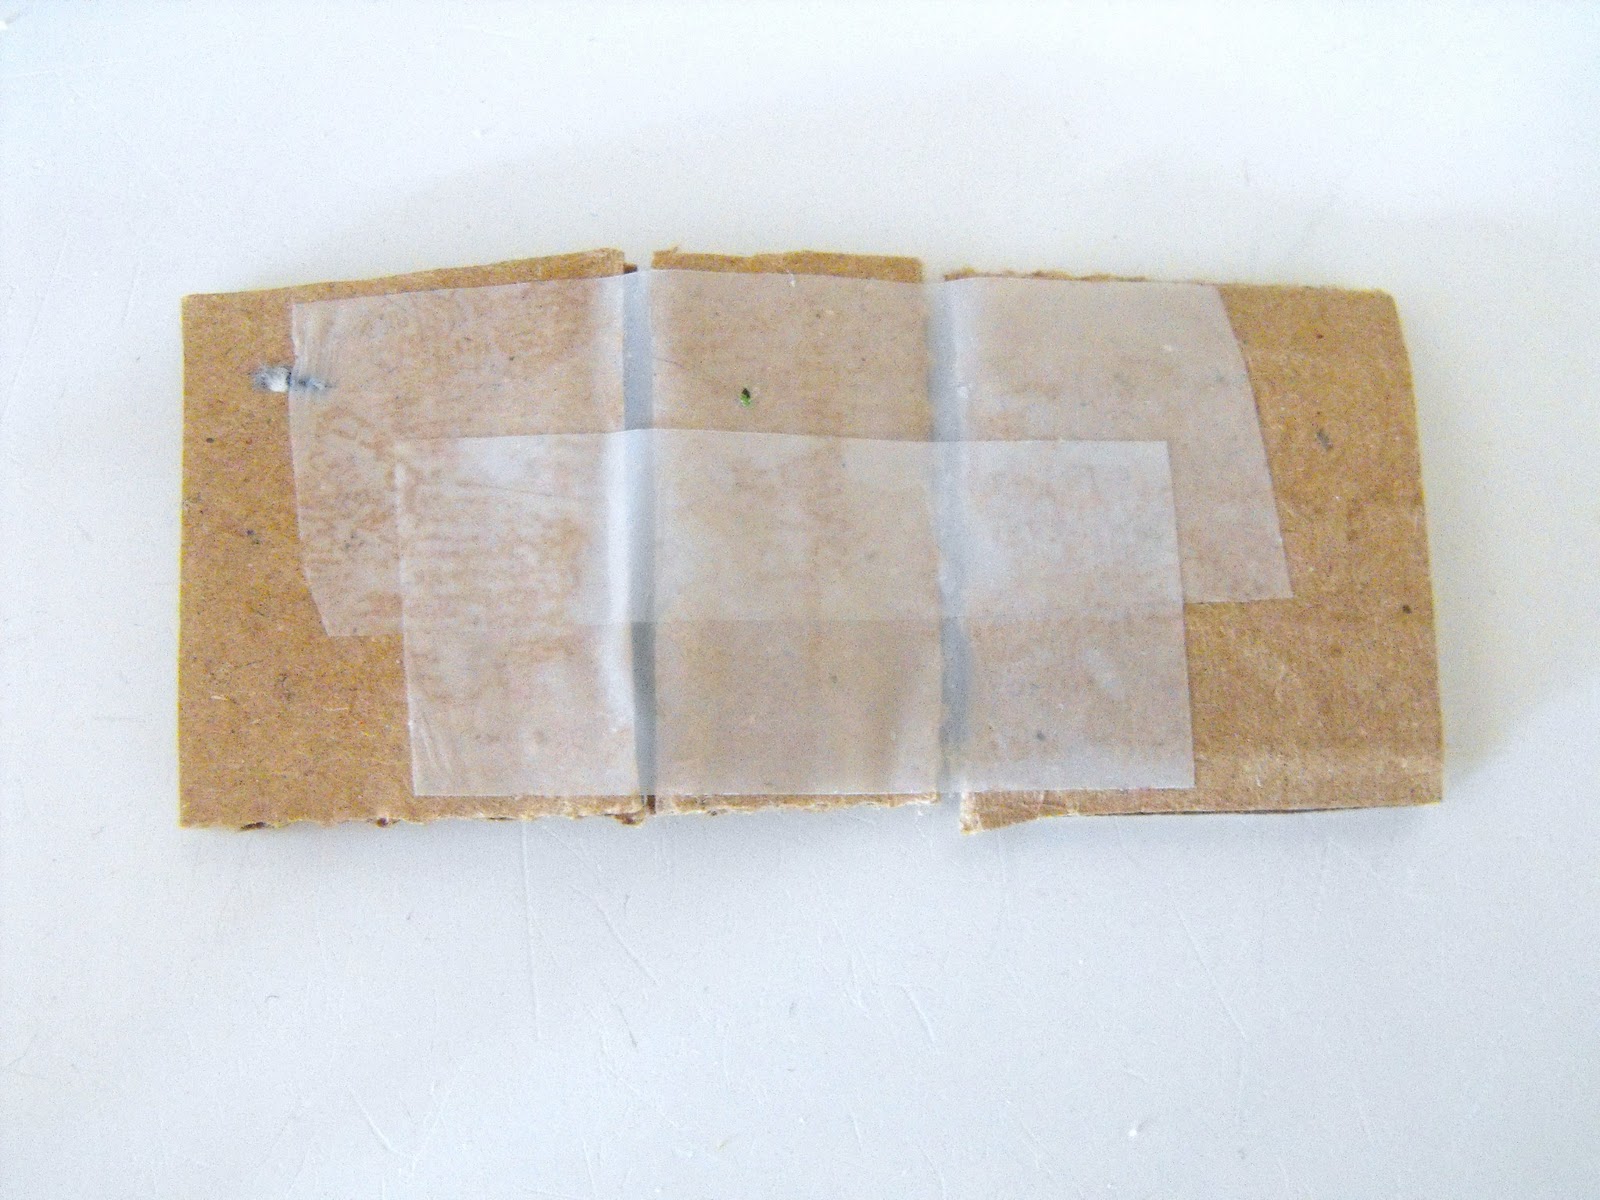
 3. Then tape them across the back leaving a hairs gap between the separate pieces, painters tape would be best but I used what I had.


4. If you left enough gap you should be able to fold the cardboard into a book shape.


5. Taking a scrap of decorative paper, draw around the book cover, depending on how large a gap you left the measurement for this will vary. Add Double sided tape to the decorative paper and stick to the book cover, either side is fine.

6. Fold the book to give you a less flat book cover. 

7. With a hot glue gun stick the wedge of papers folded 'spine' side down into the centre of the book cover, don't be scared to use a great big glob of hot glue, more is more in this case. Push down gently to make sure all the pages adhered nicely.

 8. Give it a little squish if you want your book to sit more closed, don't if you want an open looking book.

9. With Hot glue again take a scrap of leather and stick the outside of the book cover to it, you can trim round it once it's stuck, don't worry too much about the Leather looking rough or feathered at the edges, it's meant to look old right?


10. Now for the fun bit, I used a Sharpie in Gold with a fine tip and made a rough edge of Gold around the outside of the book cover.then smudged it with my finger to age it a little.

 11. To give the spine more definition take the Gold pen make a rough line and smudge it gently then add some small Gold dots, smudging again if it looks too crisp. These books are teeny tiny so unable to add a legible title or writing to it I made tiny dots of varying heights and smudged them. I just thought about where any text would be and put the dots there. In the pic below I gave the book yellowed pages by just scribbling along the book edges with gold pen.

 12. Punch a hole through the cover preferably with a needle and leaning on a Yello pages, making sure you also go through the cardboard (take it easy, I mised first time eek),add an O ring then put one or two on a chain, and wear them.

Hope this was worth the wait, an enormous 6 month pregnant belly and a grumpy Potty training Toddler has been slowing me down these days, oh and the foot is still in a cast but not for long.


Tuesday, October 18, 2011

No scraps left behind - More Leather Jewelery


leather cut out statement necklace

Wowsers I hit scrap Leather gold with Love Maeghan, she once worked alongside a Leather designer so she has some mad skills (+ ideas) on how to change up Leather, scraps and all.


Leather wrap necklace DIY

DSC_0042

This tutorial taught me something too, didn't know you could paint on Leather with regular old Acrylic paints before.

I've been toting the Glue gun this 'avo so I'll get busy with writing Tutorial no. 2.


Related Posts Plugin for WordPress, Blogger...
01 09 10