Showing posts with label Teeny tiny. Show all posts

Saturday, March 1, 2014

Dolls House Reveal


This project rocked my world, it was so much fun that for a while I'm ashamed to admit, I teetered on the murky edges of crazy Victorian doll house lady. To date I still have 4 others in varying states of repair awaiting loveliness.

Ok so 5 sounds a bit much? but they kept finding me and they were in need of tlc I just couldn't resist, like this gorgeous 1960's style open sided house. Can you believe this was just $1.50? craziness!


One thing that I learnt, is that these miniature bits and bobs may be small but the prices are anything but and since my little lady is somewhat of a Tasmanian Devil, (seriously, her Indian name would be "Raised-by-Wolves")I knew I had to make everything easily replaceable should they be stamped on/swallowed/flushed away! That's where I decided to make as much as I could from items I already have and keep everything else low cost.

Aside from the wood furniture, all flooring and home furnishings were made by me. Original plans to make everything proved way too time consuming, yep the bitter reality sank in that everything would indeed be shoved in baby G's mouth or nostril or a mixed combo of the two.

So here is the starting point, a very blah looking unloved but sturdy Wooden Dolls house, rubber cemented down Carpet sample? check, 80's paint job? check? time to get to work.


Top one is the poor unloved shell pre-makeover.


I played around with the design of the rooms and the style, first opting for something bright and modern. Check out the knitted Ottoman and cushion, knitted using toothpicks (yes I am ridiculous but it was fun) and Embroidery floss.

In the end I decided on a mix of old and new, some gorgeous Vintage fabric and a small remnant of Contact paper gave me some inspiration for colour schemes. Now to start the demolition!

I ripped out the carpet, the single kitchen tile floor and cut new floors to make it easier to change them away from the dollshouse itself.

Would you believe that all the flooring was not only FREE but RECYCLED too? double points!


Bedroom Hardwood looking flooring is actually an old Bamboo blind.
White flooring is made from popsicle sticks, which took me hours, lesson learnt, Bamboo blinds all the way baby! so quick and easy and the indentations from the blind cords made it looks like planks of wood.


Kitchen flooring is real Composite tiles sourced from Freecycle, a sample pack of 2x2 tiles cut down, glued then grouted, so pleased with the finished look of this and the fact that it's not only rainbow but real kitchen tiles made me smile.


The curtain rods were small wooden dowels I had in my stash and worked perfectly with cup hooks to keep them in place. It took my little lady at least an hour to pull the rods out but they were popped back in easily, crisis averted.

 
After searching in vain for some scalloped wooden trim to add to the sides of the under roof area I ended up using some cereal box card and a Dollar and tracing my own, a couple of licks of pink paint and we were on to a winner.
 
The vintage looking roof was created using Dollar store drawer liner, I loved how this turned out, and it smelt like Roses the whole time I was papering it. It was pretty lumpy on first application so I sanded it once it had dried and the lumps disappeared and a gorgeous aged, worn in look came about, and all for $3? score!
 
Ok ready for the Royal tour?


First the Living room, wall colour not yet decided so some colourful accessories brightened up the room,

 
The Sofa I made from scratch, stitched from real Leather, a block of wood, card and some stuffing, my first try at mini furniture and it's pretty realistic non?
Faux Acrylic Coffee Table is from the base of a Palmolive washing up liquid bottle, Patchwork rug is chopped up from small carpet samples. Ottoman is a mini Playdo tub covered in recycled shoe leather. Table lamp is a dollar store bubble solution bottle, and lamp shade is scrap fabric covered piece of plastic canvas folded and stitched together.

 
Downstairs bathroom or Kitchen as it will be when we add more furniture to the house. Brings back memories of our Portsmouth Victorian terrace with the (only) Bathroom off the kitchen! 
 
 
Furniture is by Hape, the blue backsplash is a scrap of contact paper stuck to a piece of cereal box and the bin is a $1 toy we had kicking around. Check out the wooden duck and the mini towel, and erm if you look really closely, doesn't the shower look like a teeny weeny pair of mens dangly parts? ok just me then?


I added a menu board for when the Kitchen furniture is in place, just some corrugated card covered with painted popsicle sticks and sanded for a rustic look, and the best bit? it is actually a chalk board painted with chalkboard paint, can't find and miniature chalk mind you, but it's the crazy, up all night, should be asleep thought that counts right?!

Moving up the imaginary staircase to the bedrooms, here we arrive in the Master bedroom


Bamboo blind flooring, vintage fabric glued to the walls and a faux chair rail and baseboards/skirting boards were bamboo blind pieces again, such a great source of wood that didn't need staining.

A vintage eyelet doily for a rug, two Hexagonal Brass drawer knobs as bedside tables and some more miniature sewing.


I hated the way that bedding never sat flat when I was little, so I just sewed a tiny pintuck down each side of the bedspread, it did the trick and looks a bit more realistic. The pink cushion is knitted again with Embroidery floss and toothpicks.


The Dresser was given to me and the 'fabric' inside is bias tape or lace seam binding glued and folded around a small piece of cardboard.
 
Saving the best to last, here is the childrens room. The furniture again is Hape, so cute and fun, every detail is thought of.

 
The rug is some bakers twine looking cotton yarn I had, I just twisted it around a piece of cereal box card and glued as I went, love the rag rug look it has.

 
Faux cow hide rug is some minky fabric scrap simply cut in a erm, dead cow shape. Check out the amazing vintage contact paper, I love this design and the fact it has England, Canada, France, Germany and Greece on it and the illustrations are so cute. 

 
The flooring is popsicle sticks sanded cut and painted once stuck down, long time in the making but I do love how it turned out.


The curtains I made and added ribbon tie backs then draped a small piece of pompom trim over the top.

 
The whole shebang.
 Soooo still with me? still awake? understand why this project was a year in the making?... and just remember I have FOUR more of the suckers to finish lol.


Coming up? some actual real life not teeny tiny at all Sewing!


Shared here


Tuesday, September 17, 2013

Sauce bottle lid to Embroidered Pincushion

\
 
I've been heard to witter on about the awesome Craftster (crafting community) around these here parts, if you aren't aware of it , you probably should be, in fact go look me up (mink_bikini) then perhaps excuse my completely ridiculous user name!
This little slice of crafty goodness I've been working on is for a Pincusion swap on Craftster . My partner was looking for a bottle cap pincusion to add to her collection, and she likes Paisley so instead of the usual teeny tiny pincushions I've made before, I upped the ante and used the lid from a squirty sauce bottle. It gave me a decent sized surface to add some swirly loveliness, sequins and well, who does not love Rick Rack!


I am definitely no expert in Embroidery, but I threw a few stitches at it from my limited skill set, Chain stitch, Blanket stitch, Lazy Daisy, French Knots somehow the Blanket stitch came out in two different versions (totally by chance!)
 
 
Not a bad transformation wouldn't you say! another otherwise discarded piece of waste turned into something useable and cute.


Hmmm swirly!


Still fits in the palm of your hand, perfect size!


This one will soon be winging its way to the USA but if you're hankering for some more Bottle cap goodness you should definitely check out HERE, you see it turns out, that Bottle caps are my thing.

Wednesday, June 12, 2013

Little House pincushion


Is there anything cuter than a tiny house? and a tiny house that's practical, girly and for a fellow lover of Sewing and crafts? This was my offering for the lovely Kitty_Catty on the One Tiny House Swap on the super duper Craftster
 
 
Inspired by a vintage magazine (as per usual) from the 70's which used Rick Rack for roof tiles I rustled up this beauty. Would you believe that the Window Rick rack is the baby variety? so teeny tiny!

 
I was able to take all the supplies from my enormous stash/hoard/pile of everything crafty, but originally the red Cord from my beloved Reuse Centre (love that place!)

Things are almost calming down enough for me to get back to scheduled posts, so much to post, so little time, usual busy Mama story, you know the drill ;)

Thursday, March 7, 2013

Milk Bottle Top Mini Embroidery Hoop

 
I love me some Milk Bottle tops, I seriously collect every single one of those badboys and have an embarassingly huge stash. Well this cute little sucker started out as a Milk Bottle top, yeah seriously it did.
 
I took part in a Craftster Tiny House swap recently, and could not decide on what to make for my partner, in the end I made two different houses one decorative and one a functional useable bonafide (fill in the blanks, sorry swap pard'ner so spoilers, not on my watch!)
 
This was just a see how it goes cross stitch no pattern deal and I think it turned out so cute, what isn't there to love about something teeny tiny, pink and with a bow on top. 
 
 
Fancy making one of your own? Check out my tutorials page for your step by step instructions. They work up quickly as you can imagine and are a great way to use up the scraps of Aida after framing a larger cross stitch piece.
 
Coming up? Those amazing ribbons? finally a teeny tiny taster of a larger project that's in the works.


Wednesday, November 7, 2012

Mini Engraved House


I recently won $400 in gift cards for an amazing local Art store for my Medal Ribbon submission. So each time I visit and treat myself, I try to pick up a different type of material I've not worked with before. This time round it was a heavy grade foil.

I love anything teeny weeny and what's cuter than a teeny house? I  had some Polystyrene packing pieces I wanted to find a reuse for so I carved a square shape, gave it a roof and got to work engraving/embossing a little house, it's extremely wonky (I'm gonna claim that's my style!) but I had fun, rescued something that can't be recycled and added one more teeny house to my collection,

 
Round the back

Want to make your own?

  • Make a small box from Cardboard (cereal boxes are perfect) Matchboxes would be great for this if you have some to hand.

  • Lean on something soft to get the crispest embossed picture, Styrofoam or craft foam works.

  • Embossing and special cutting tools not required, a Dried out ballpoint pen works, or a Toothpick, and cut with plain old scissors.

  • When it comes to gluing I Hot Glue gun everything, and it turns out Polystyrene melts! (Durrrr) so using just Polystyrene without a box around it will make it hard to glue. Pop the polystyrene into the box then wrap your tooled foil around it, then gluing is a cinch.

  • I just folded each edge almost like gift wrapping, if it's too bulky just snip a bit off.

  • Sharp edges? make them blunt by leaning the pokey bits on a hard surface.


Having played with the foil I now want to get hold of some Aluminium flashing, the foil creased way too easily so it's time to bring out the big guns!


Monday, September 17, 2012

Teeny Tiny Needlepoint House & Painted Tea Chest

 
For a recent Craftster swap entitled Anything Goes Tiny House Swap, I made a Needlepoint house using this great tutorial Craftypod - Plastic Canvas Gingerbread House Tutorial I've made several of these (all different) and I've always been dead chuffed with the result.


To show how tiny it is
 
 
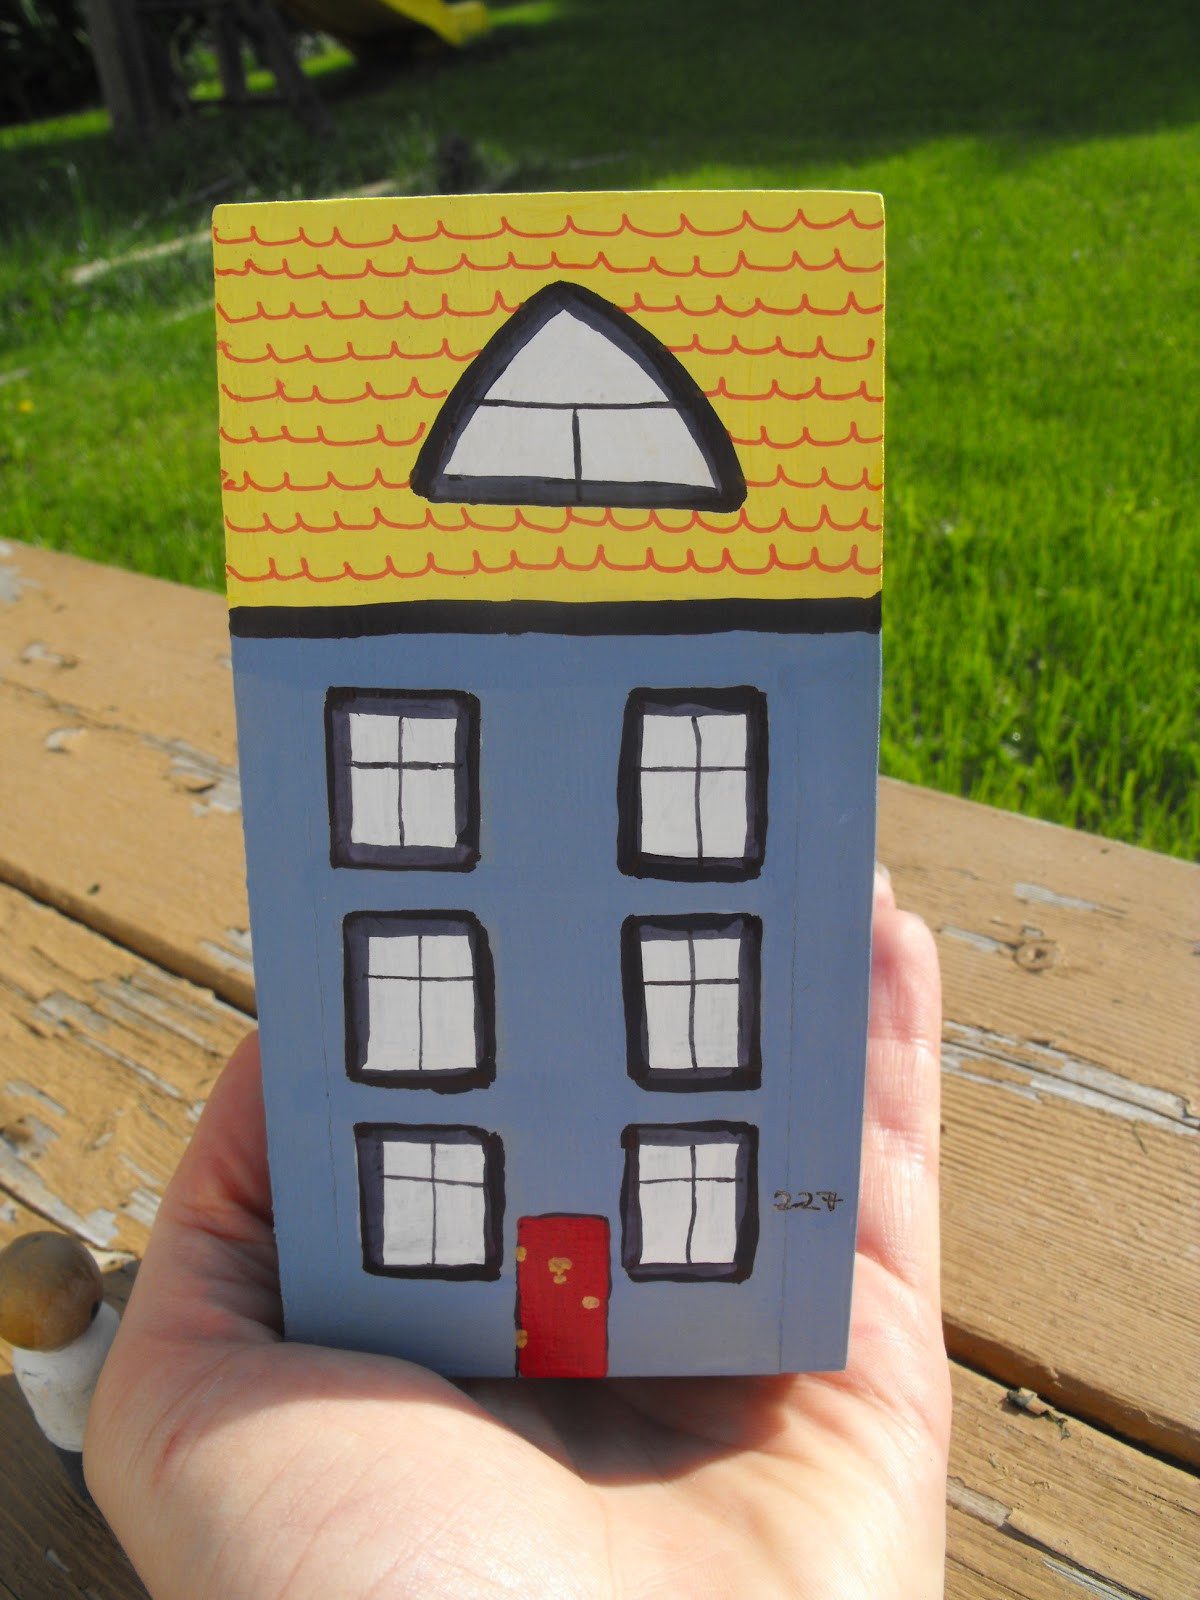
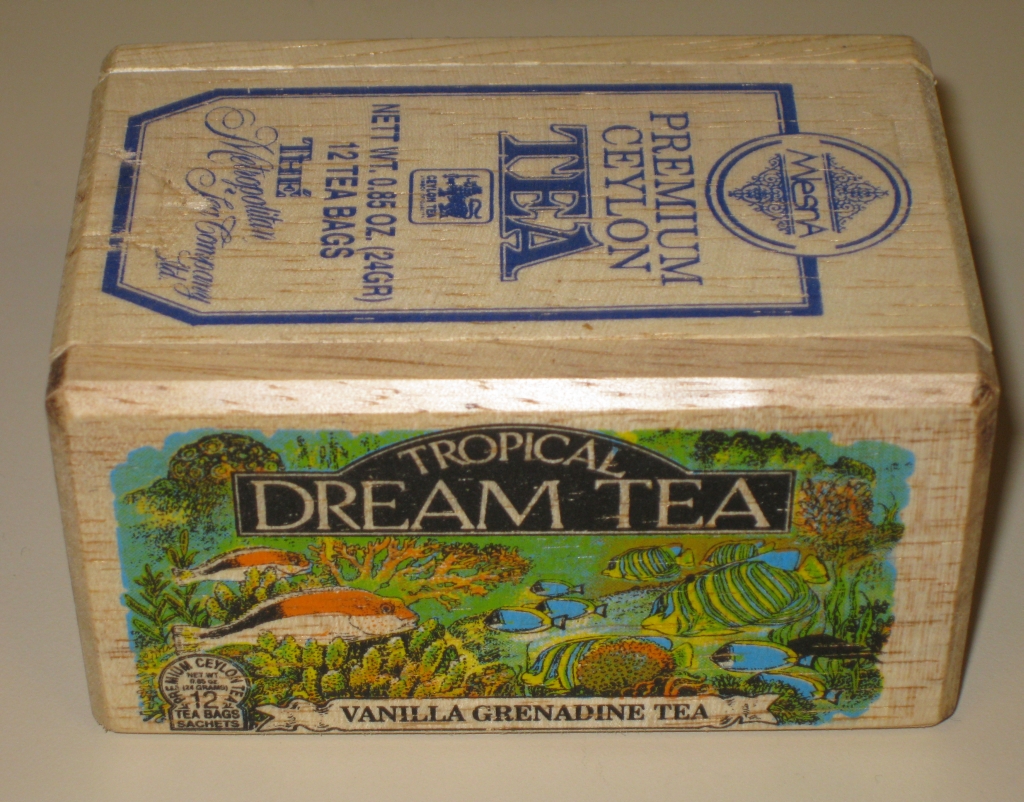
But how do I ship to the US without it getting flattened? I pop it inside a teeny shipping crate (read Old wooden tea chest), but not just any Tea chest, Nope I broke out my Kindergarten level painting skills just one more time to produce this beauty. A wonky Victorian mansion house based (very) loosely on a flat I used to live in, in a 1900's Victorian Mansion by the sea.
 
 
And because I can't leave well enough alone, here's a shot of some back door action, complete with knocked over rubbish bins, a smelly-cat and a Fire escape.


Thanks to another Craftster member for the cute painted family (MamanTattoo) yup, focus on the people and not my floating roof tile lines ;)
 
 
  Similar example of the tea chest I used via
 
This was another fun project made with stuff I had to hand, love it when that happens, of course now that I want to make some more painted tea chest houses for the kiddos I can't find any more tea chests anywhere!

Tuesday, July 31, 2012

Christmas in July - Mini Wreaths

All month I've been consumed by Christmas excitement, mainly because I have so many mosquito bites that Summer is now dead to me, and I'm hankering for some scarf and woolly hat weather.


These mini wreaths started off as a Cardboard tea bag box, then using a large and small Circle punch I whipped the bases up in no time. Then wrapped them with pipe cleaners, Beads, sequins and ribbons from my 'too small to be of use' ribbon box.


As usual I made a ton, so I'll be scattering these liberally around my tree and handmade gift wrap this year. Don't they look cute all lined up?


This project idea came from Martha Stewarts Handmade Holiday Crafts book, my oldest younger sis Hannah bought this for me, she must be buttering me up, or maybe she still feels guilty about the year she bought me a 50p scented candle, or Candle-gate as it has since become known as ;)

For size reference, I'm always amazed at how Sausage like my fingers look on closeups ;)

More unseasonal Christmas projects coming up, looks like a Christmas in July, August, September ...


Note: Clicking on the link doesn't mean I get paid, just wanted to show you the inside of the book via Amazon.com
Related Posts Plugin for WordPress, Blogger...
01 09 10