

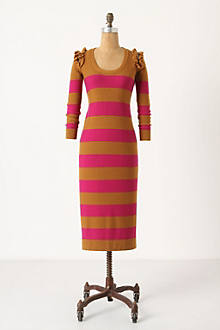
$3 makeover vs $560 original!
Ok so my first Anthropologie knock off tutorial will show you how to make the shoulder detail which could be added to sweaters, dresses, even t-shirts if you used t-shirt scraps.
What you'll need:
At least a full sleeve of sweater fabric
Two 8 inch zippers with metal teeth (can contrast or match)
Sewing machine
Fray Check (or serge/zig zag stitch raw edges)
Chalk (or other non permanent way to mark the fabric)
1. First take your sleeve and cut it into two rectangles roughly measuring 4 x 16 inches, it takes one rectangle per shoulder ruffle. Cut off the corner ends of each rectangle to give a slightly tapered shape. To stop the raw edges from unravelling fray check the edges now, either that or you could zig zag stitch or serge the edges to begin with.


2. Draw a line with chalk down the middle of the rectangle, (yes mine was wonky) then draw a line either side of that approx 2/8 away from the centre line, the two outside lines will be your gathering lines so stitch along those with a long stitch length (4 or 5) then backstitch at one end, start gathering at the end that you didn't backstitch by pulling on one of the threads (then repeat on other side). You want to keep pulling on the threads until your rectangle is the same size roughly as your zippers.


(This next part sounds tricky but it's not essential, you can bypass this step and just stitch the zipper down on top of your ruffled edge then go straight to step 4. but you will need to make your gathering stitches further apart from the centre line, 5/8 should do it.)
3. For a narrower looking zipper like Anthropologie, take your zipper and fold back roughly 2/8's, flip over the zip and fold the edges back until they touch but don't overlap the zipper teeth. I tried easy ways of keeping the zipper edge folded back like basting tape and even ironing it but neither really worked. Try to finger press along the line, or fold it and bite along the edge, sounds weird but it gets the job done. Ok now open your zipper and line up the metal zipper stops at top and bottom with the top and bottom of your ruffle piece. The extra bit of the fabric which has no metal on it should overhang the ruffle at top and bottom.
Now line up the zipper teeth with the centre stitch line and the folded edge line up to the gathering stitch, stitch down with a straight stitch. Repeat on the other side of the zipper, closing up the zipper first and folding the other edge back as before.


4. See the overhanging pieces of zipper? flip the piece over fold back the extra bits and stitch down, back stitching to secure your stitches.


5. Next stitching the shoulder ruffles in place. To ensure both ruffles are even, measure 5 inches forward from the shoulder seam (where back and front pieces are sewn together) then line up the zipper with the sleeve seam (where sleeve meets shoulder), the ruffle will overhang this seam, pin and start hand stitching two lines of sewing just inside the edge of the zipper tape. Make sure that both zipper pulls are facing forward. Pic below taken before stitching hence ruffles a bit wonky.

I chose to handstitch because I like to be able to remove things if I get bored of them but for a more permanent option just follow the instructions above, pin and sew using a zig zag stitch on your machine.
Caution: Using a straight stitch on your sewing machine will limit the stretch of your sweater and may result in the stitches ripping when you put the sweater on.
Only have a small scrap of knit fabric but fancy trying this out? why not make one ruffle and attach it to your centre Front as a mock Zipper opening.


Ruffle front option and Before shot
That's it, sounds way more complicated than it is, I just like to make steps for everyone to follow. If you like this tute then let me know, who doesn't love comments :)

5 comments :
You are such an incredible talent! I love these ruffly zippers and I'd choose to spend $3 over $500 any day! :)
That looks just like something you could buy at an expensive and hip shop. Love it!
How cool is that, really nice!
Awww thanks my lovelies, that's so kind. Please if anyone has any problems following my instructions let me know. :)
If you're wondering the sweater fabric I refer to in making the ruffle is a regular store bought (but thrifted) Acrylic knit sweater, Cotton or even Fleece would totally work as long as the knit stitches are tight small and in no way open or lacy.
Fleece is your super quick and easy option, no fraying means no extra steps, old track tops could be used for this, keep it green though this is meant to be a recycling project, don't buy new, thrift/Charity shop/Op Shop it.
Post a Comment